User Manual
Herconnect chatbot
You can also refer to this video tutorial for more detailed instructions:
What Does each Button Do ?
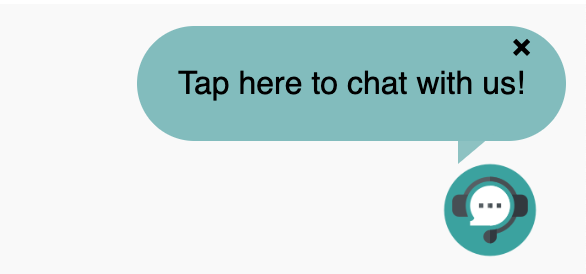
- The button located at the bottom right corner allows you to access the chatbot. You can find it here:
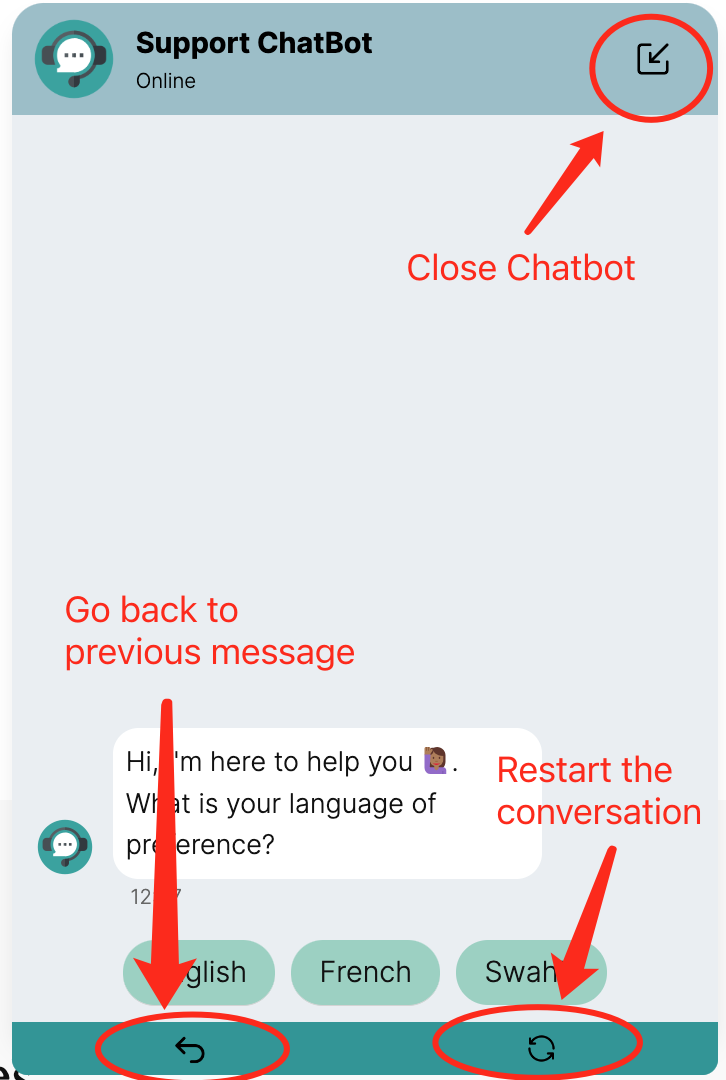
- Once inside the chatbot, you'll encounter several buttons with various functions. These buttons enable actions such as closing the chatbot window, navigating back to the previous message if an incorrect option was selected, and restarting the conversation by selecting a different language. You can see the descriptions of these buttons here:
How to Find Resource
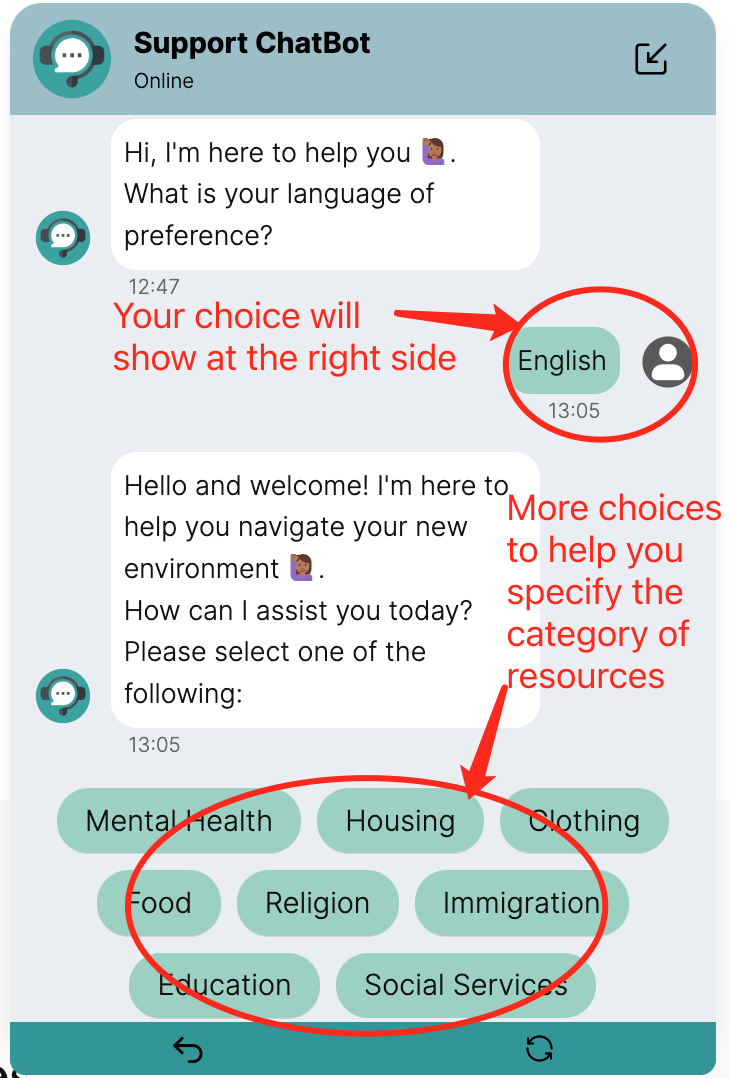
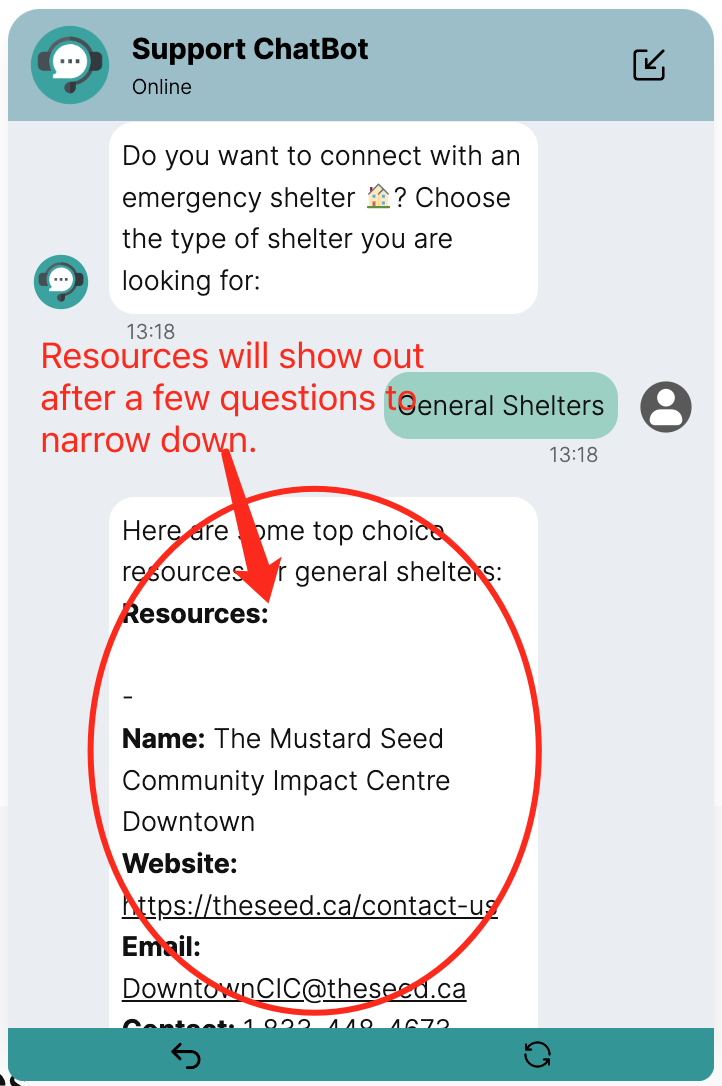
- In the chat flow, the left side represents the chatbot, while the right side displays the choices you have made. Additional options are available at the bottom of the chatbot interface to further refine your search and assist in locating the specific resources you require. As you progress through a series of questions, relevant resources will be generated to address your needs.
Want to Get Follow-up?
-
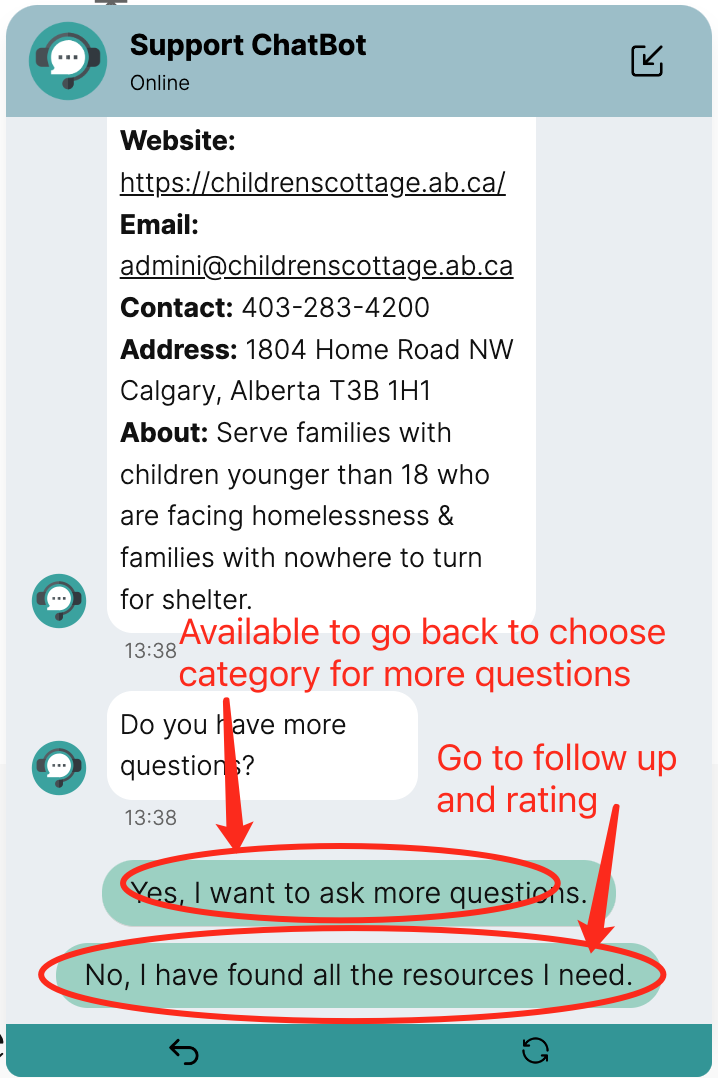
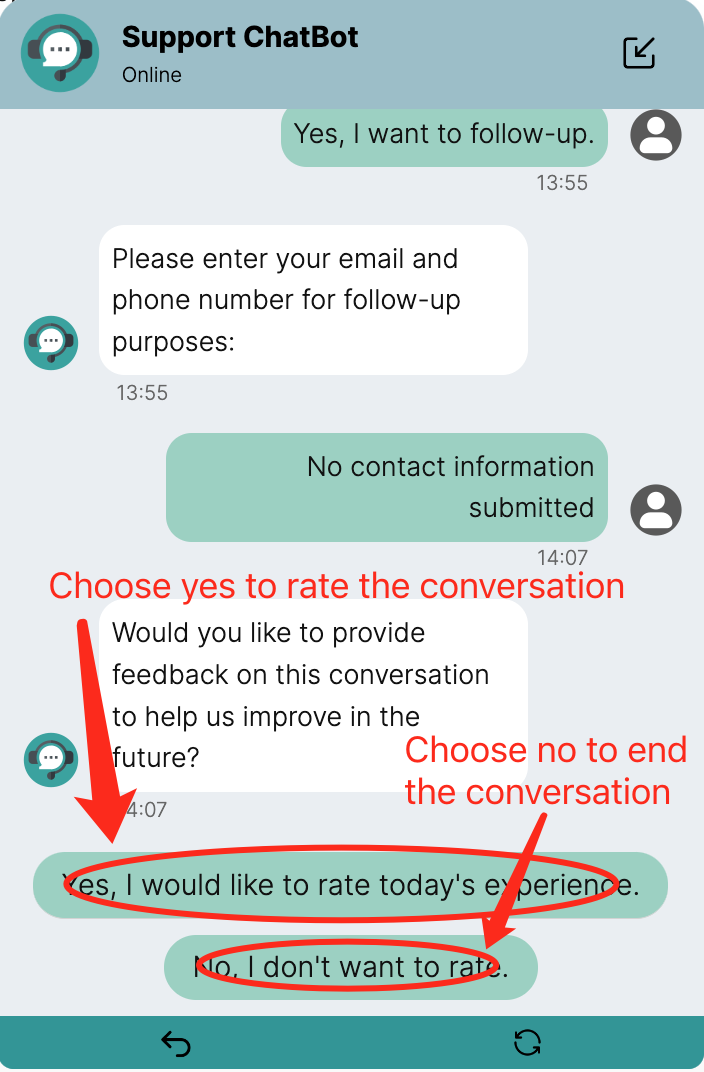
Upon reaching the conclusion of the conversation, you'll be prompted to indicate whether you have additional questions. If you select "yes," you'll be directed to choose a category for further inquiries. Alternatively, if you choose "no," the chatbot will guide you to proceed with follow-up actions.
-
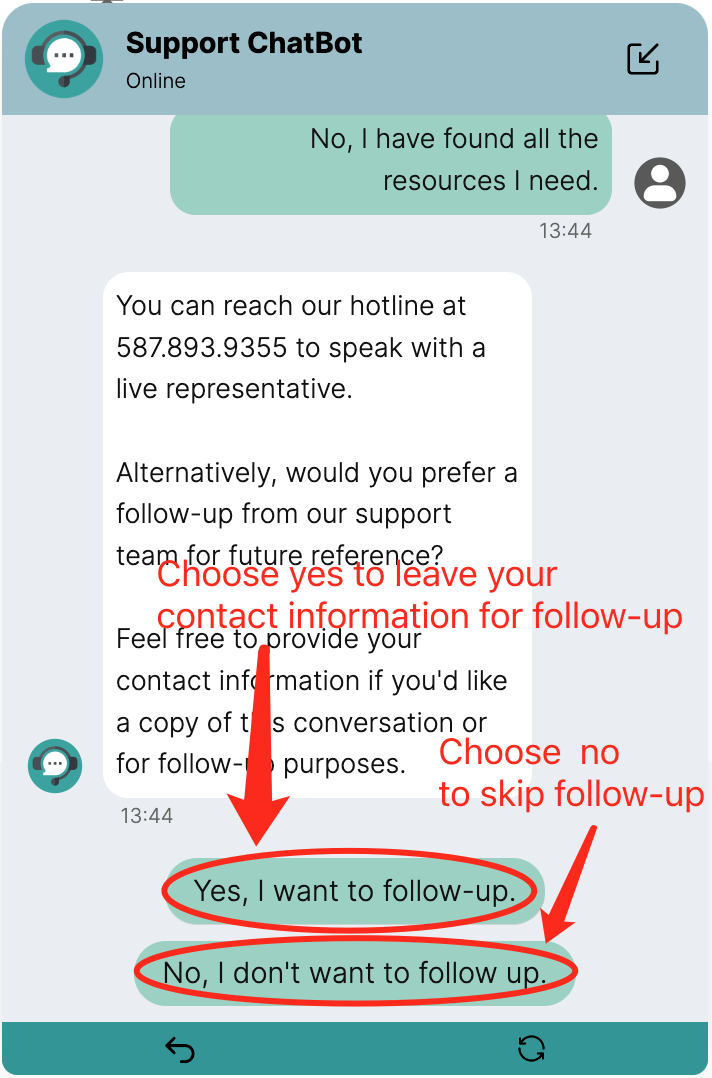
You have the option to choose "yes" to provide your contact information for future follow-up by a Herconnect worker, or "no" to decline further follow-up.
-
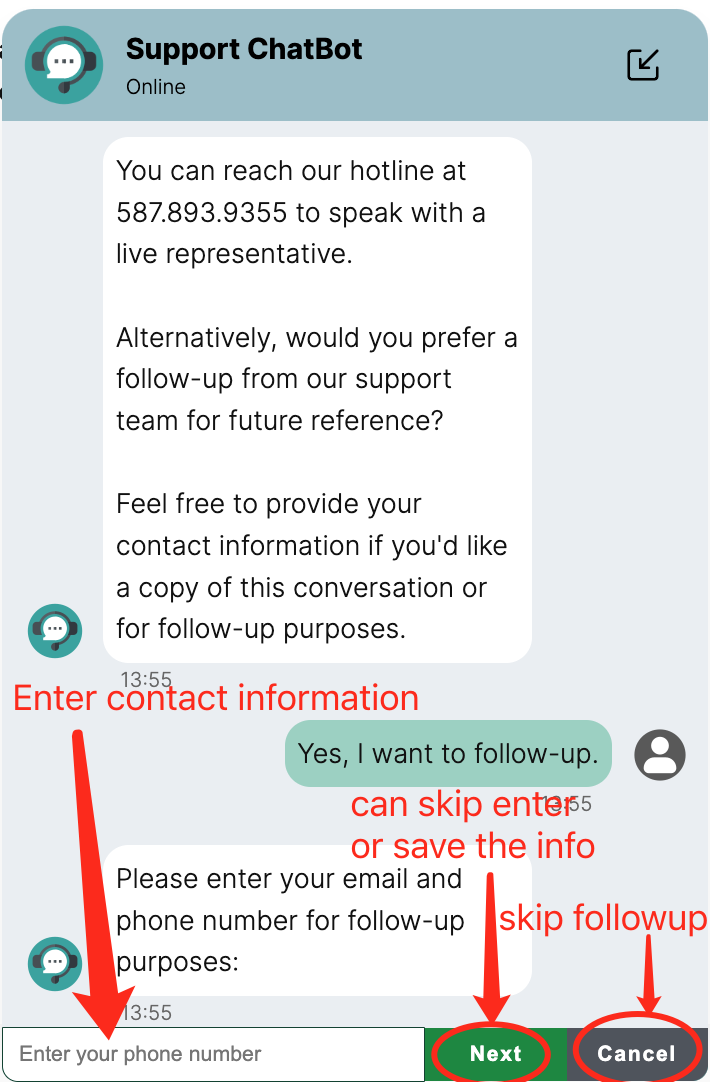
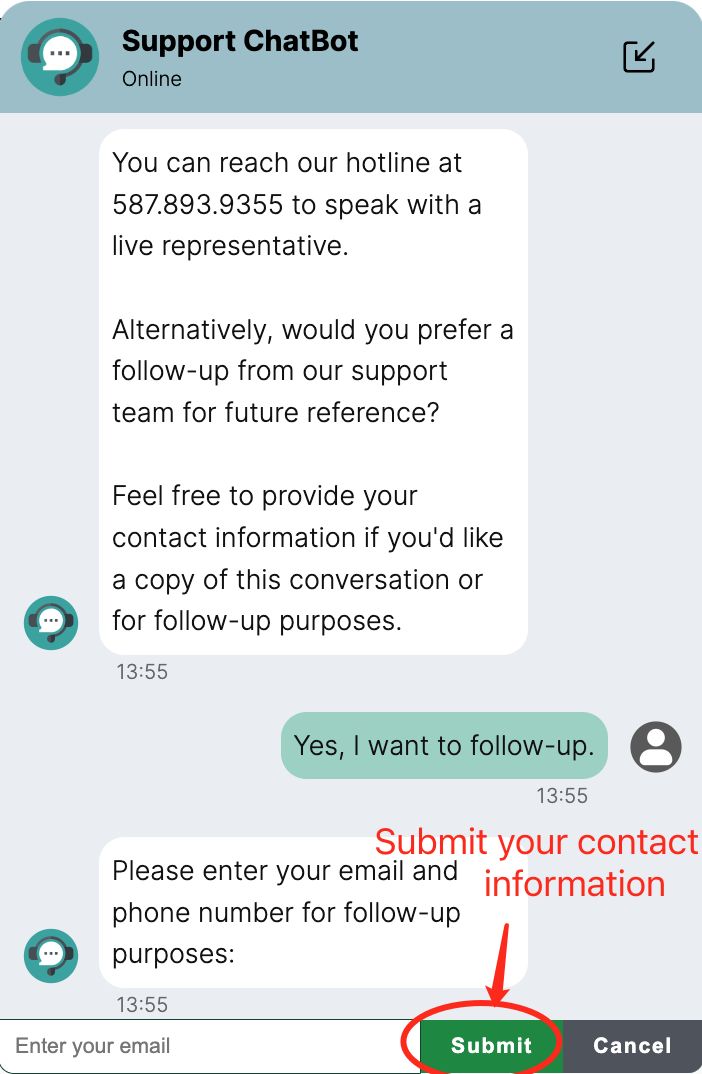
The input box allows you to enter your phone number and email address. If you don't have this type of contact information, simply click "next" or "submit" to skip. Pressing "cancel" will also skip the follow-up session. A Herconnect worker will reach out to you later. If you provide your email address, you'll receive a copy of the conversation for your records, along with the resources discussed.
Rate the Conversation
-
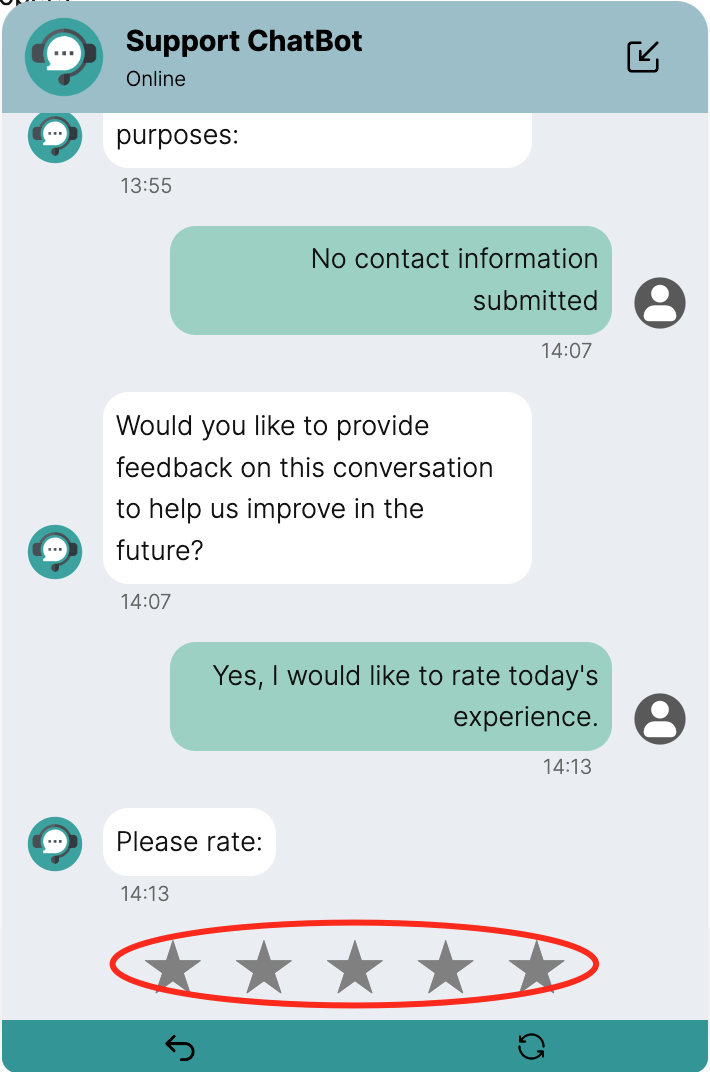
Similar to the follow-up process, you can opt to rate the conversation by selecting "yes," or skip it by choosing "no." Rating 1
-
When rating the conversation, you'll need to indicate your satisfaction level by selecting the number of stars corresponding to your experience. Additionally, you can specify whether you found the provided resources helpful. Ratings range from 1 (worst) to 5 (best).
Admin Page
How to Login
- Please enter the provided username and password to access the admin page.

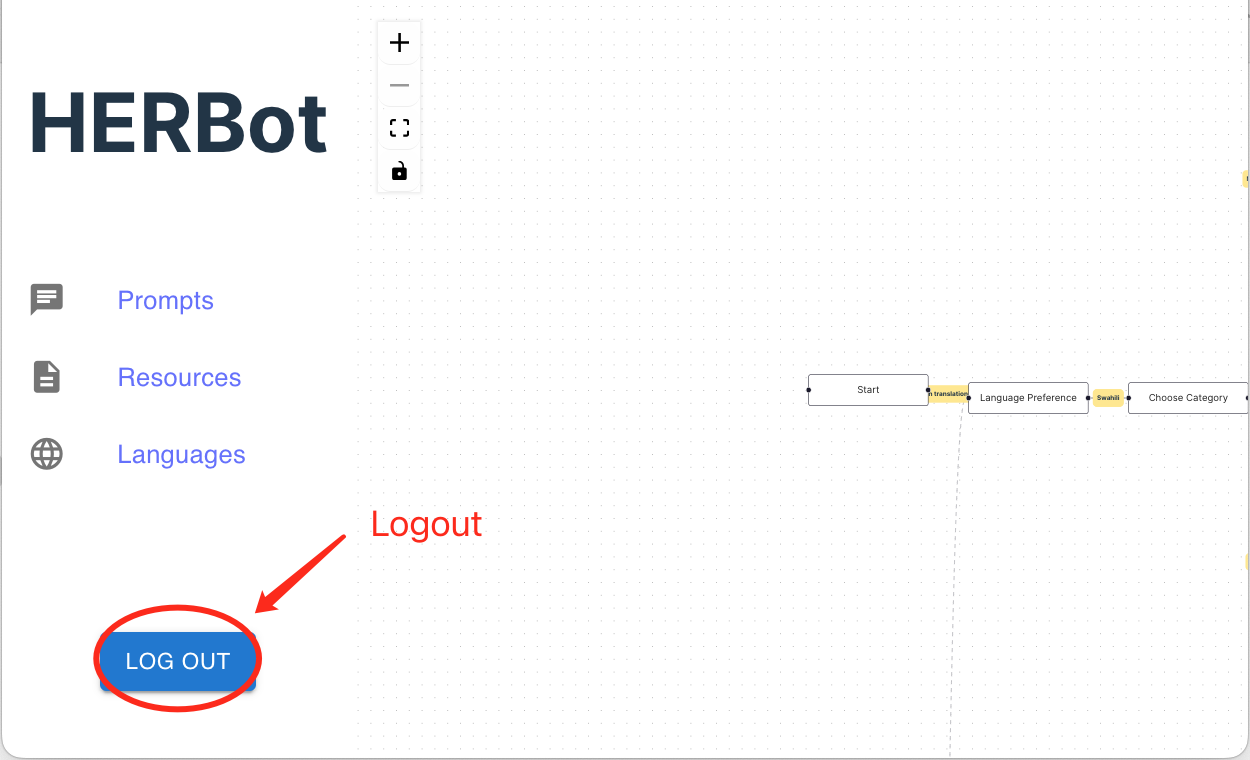
- You can always locate the logout button at the bottom of the left sidebar.
How to Understand the Flow
You can also refer to this video tutorial for more detailed instructions:
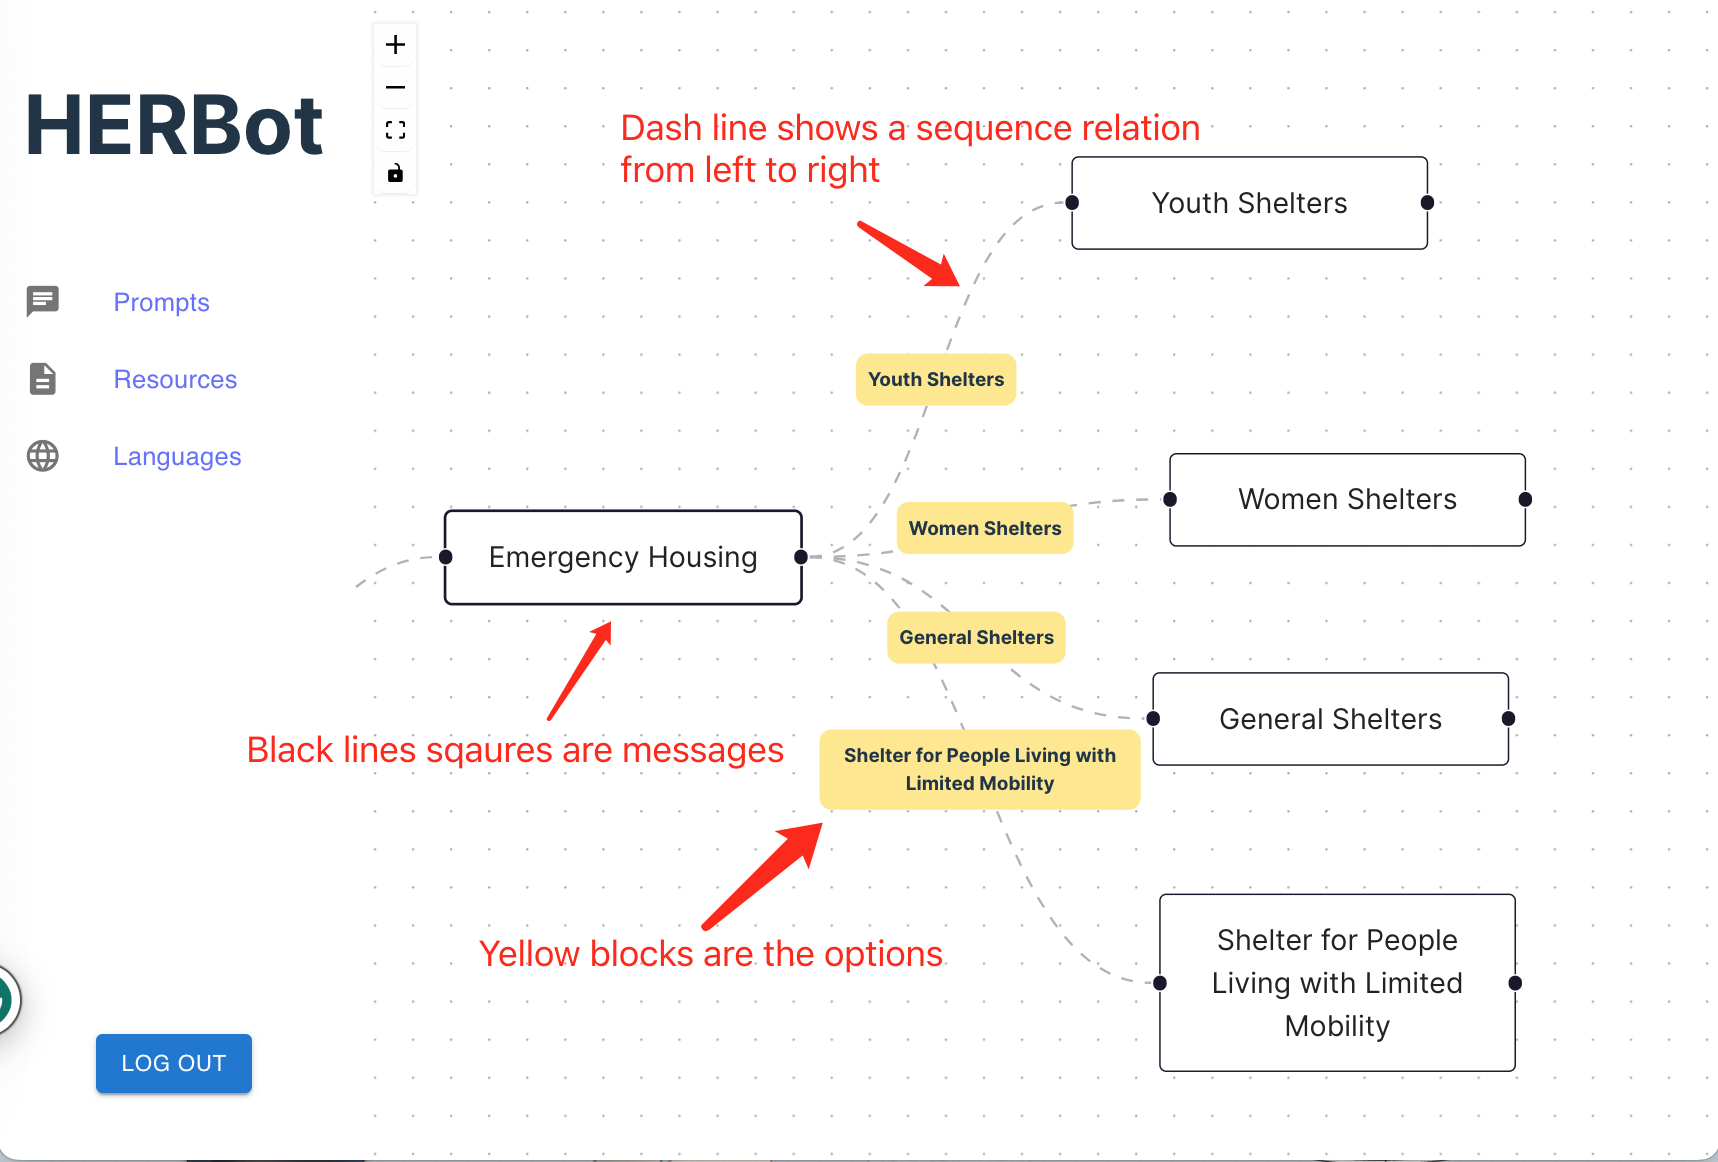
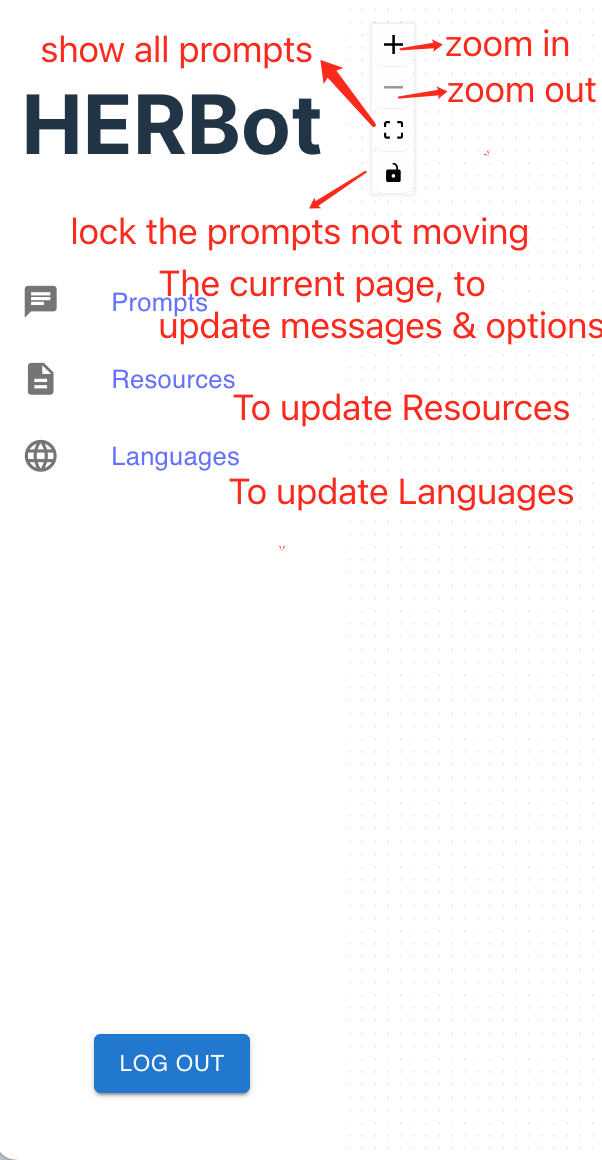
- The black-lined boxes represent messages (prompts), while the yellow boxes denote options. The dashed lines between black-lined boxes illustrate the sequence relation from left to right.
- Regarding the four small buttons, the first "+" enables zooming in, the second "-" facilitates zooming out, the third button shows all messages (minimizing them), and the fourth button locks the relative positions of messages. On the left sidebar, "Prompts" pertains to the current page, allowing users to add, delete, or update messages and options. "Resources" redirects to a page for managing resources, enabling users to add, delete, or update them. Similarly, "Languages" redirects to a page for language management, allowing users to add, delete, or update languages.
How to Update/Delete/Add Messages and Options
You can also refer to this video tutorial for more detailed instructions:
-
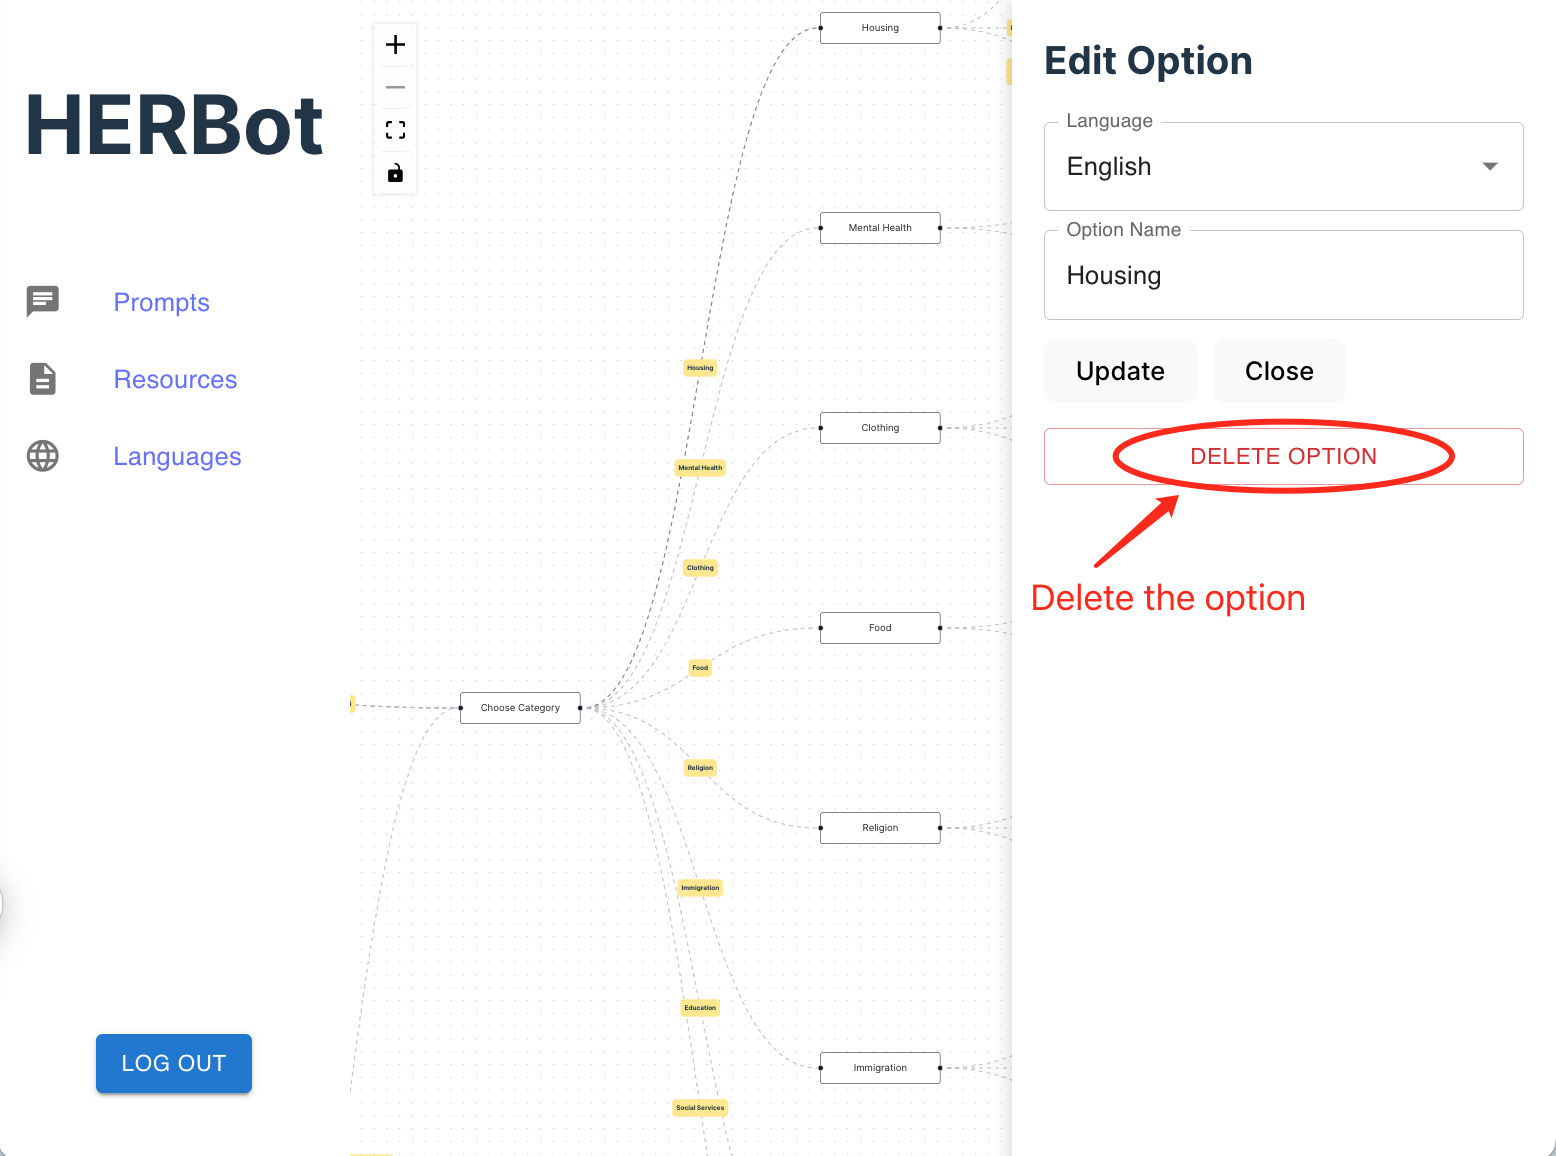
To update an option, begin by clicking on the yellow box corresponding to the option you wish to modify, select the desired language, edit the content as needed, and then click on the "Update" button.

-
Alternatively, to delete the option, simply click on the delete button. Please note that this action will also remove all translations associated with this option.
-
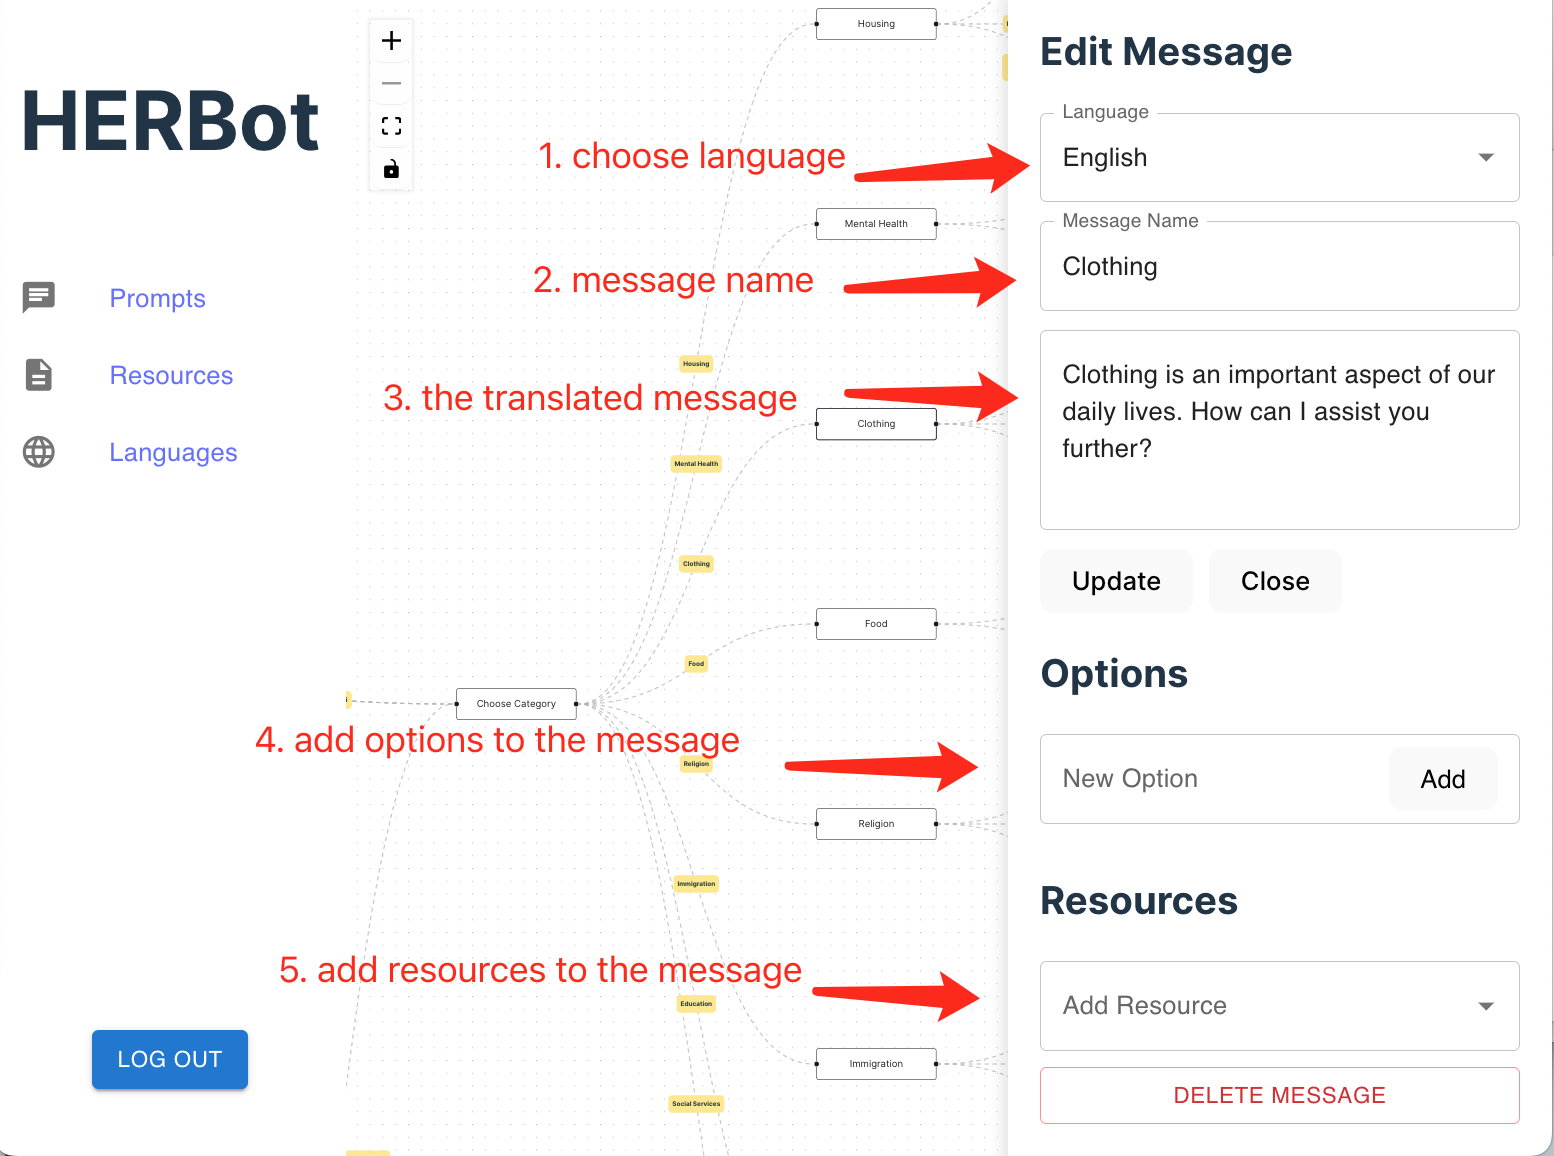
To update an message, begin by clicking on the black-lined box corresponding to the message you wish to modify, select the desired language, edit the content as needed, add the options and resources bound to this message, and finally click on the "Update" button.
-
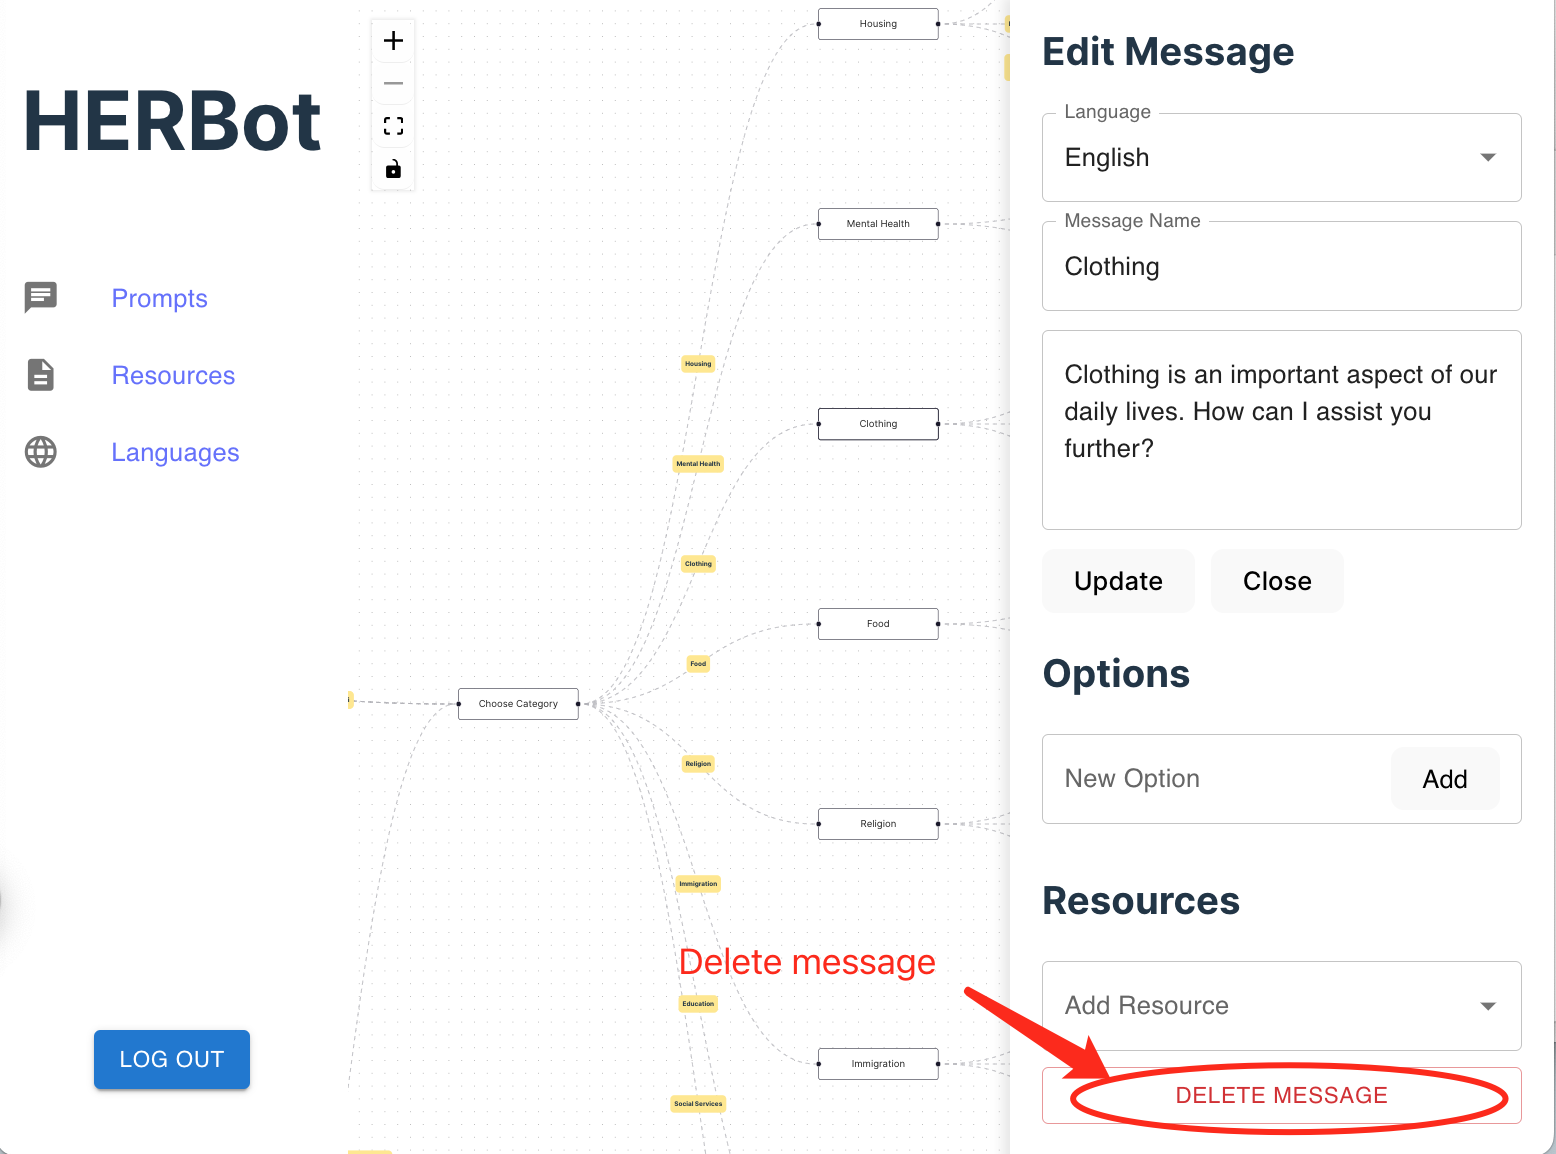
Alternatively, to delete the message, simply click on the delete button. Please note that this action will also remove all translations and follow options associated with this message.
-
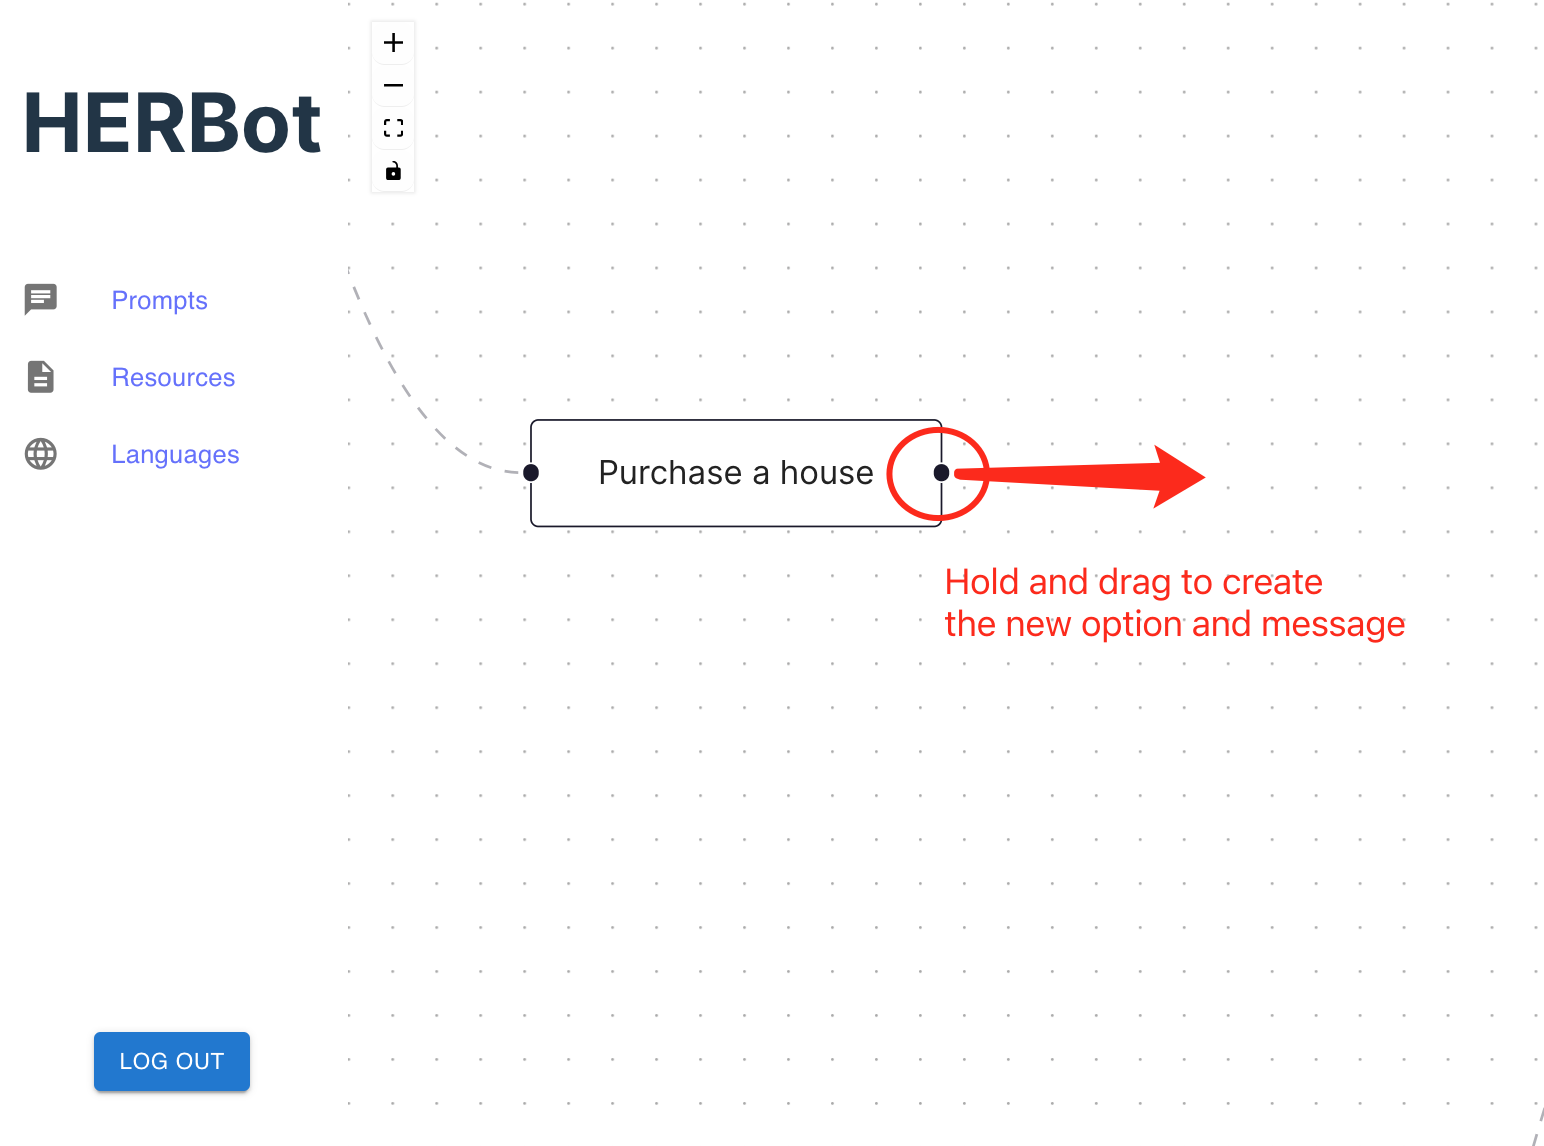
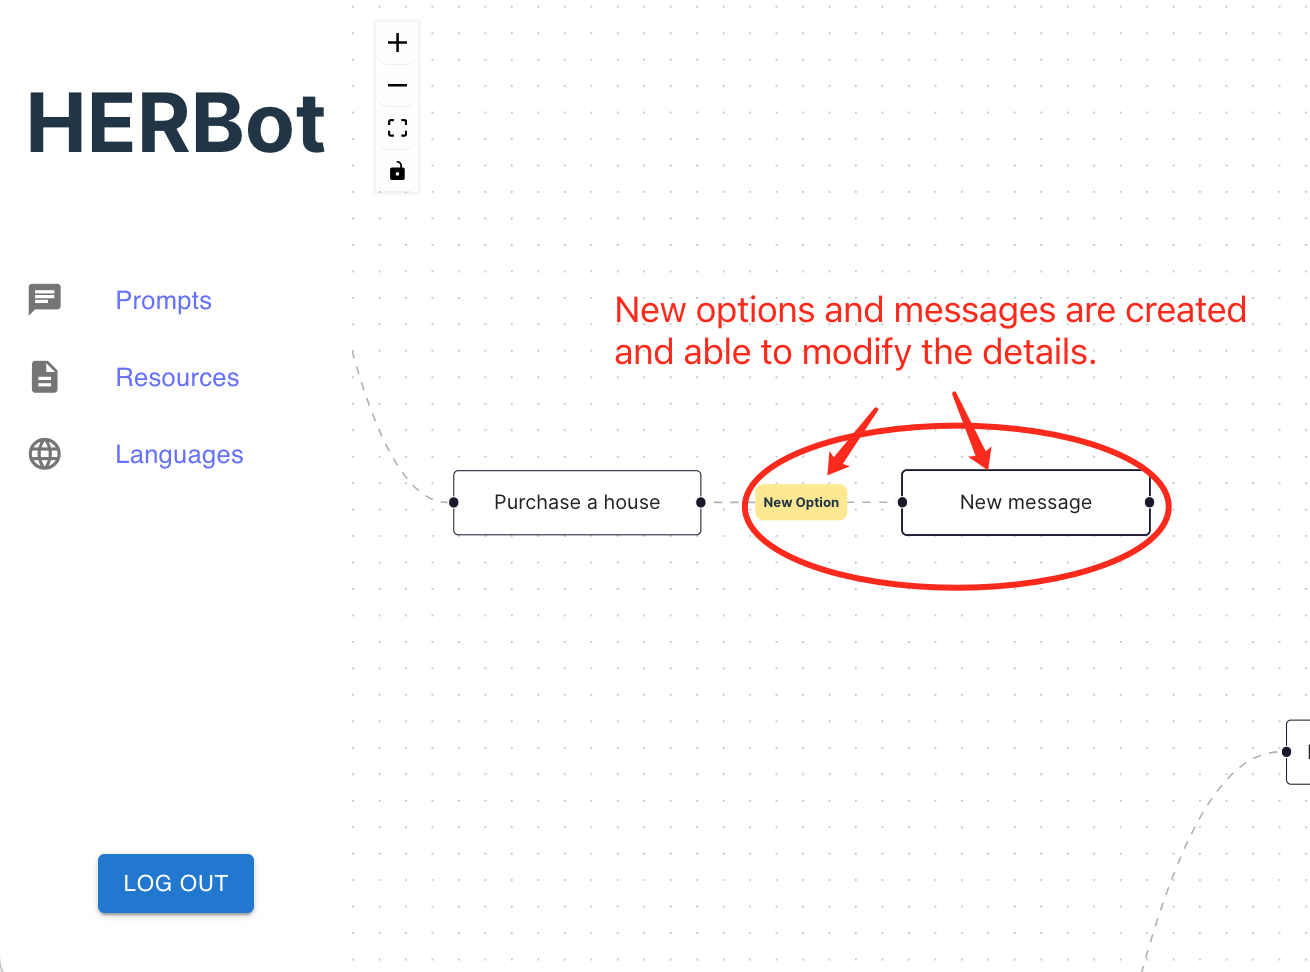
To add new options and messages simultaneously, follow these steps: Select the message to which you want to add options and messages. Press and hold the right-side black point. Drag the point to the right. When you release the mouse button, new options and messages will be created. Modify them as needed, following the steps outlined previously.
How to Update/Delete/Add new Resources
You can also refer to this video tutorial for more detailed instructions:
-
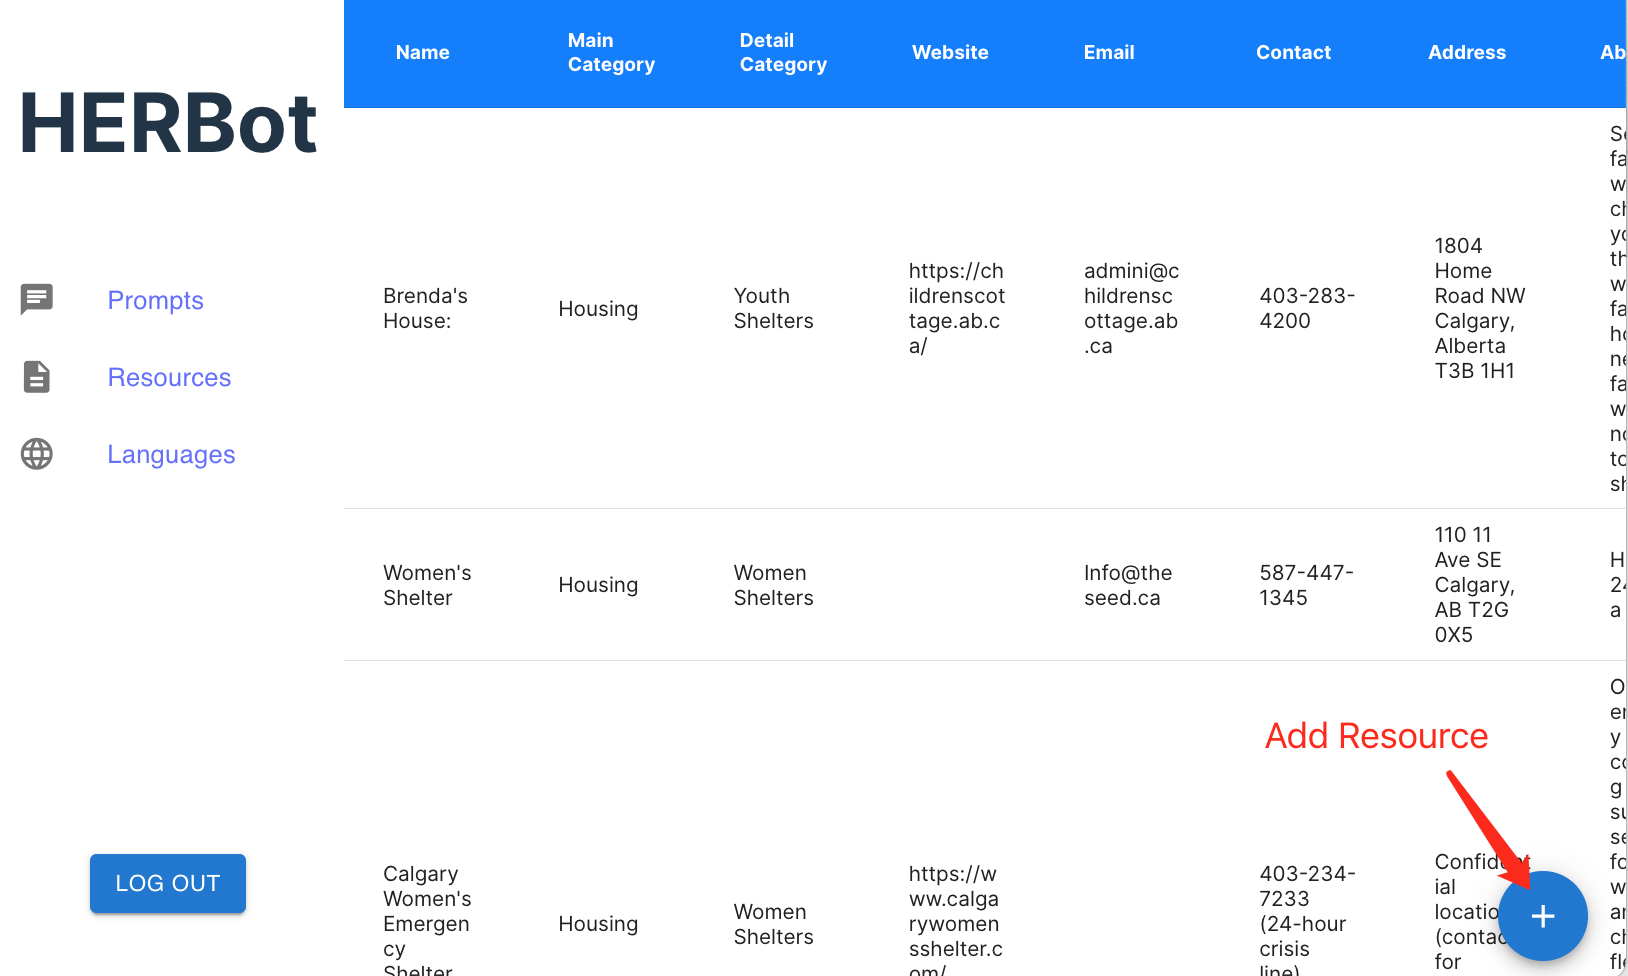
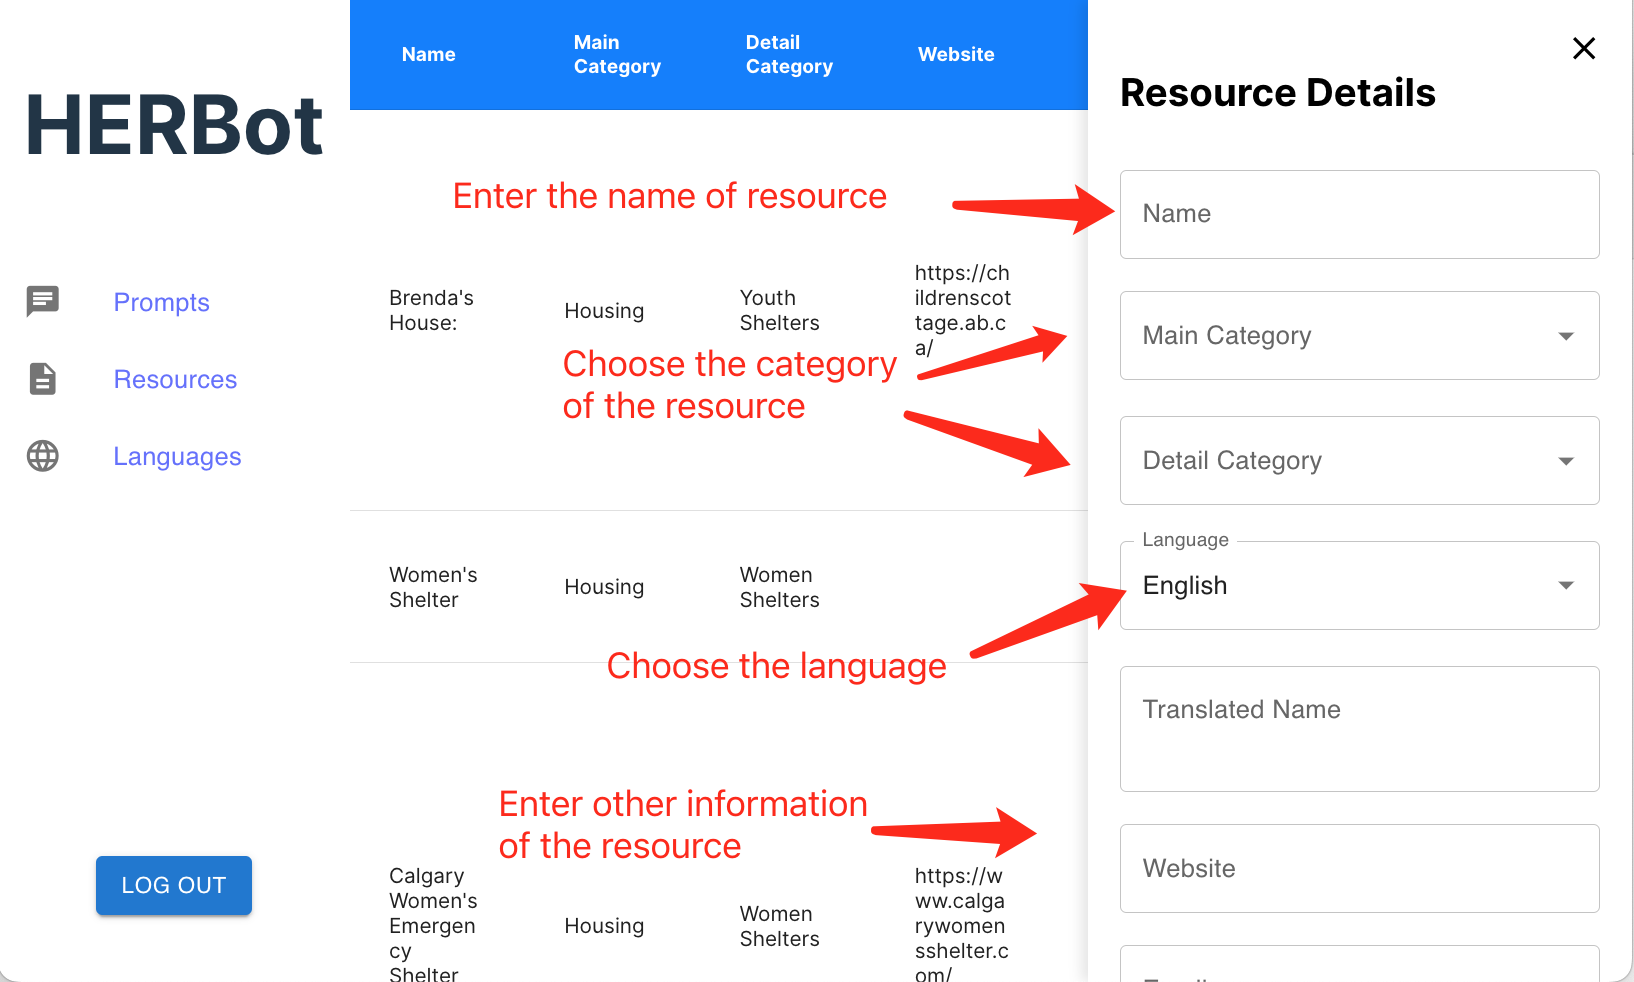
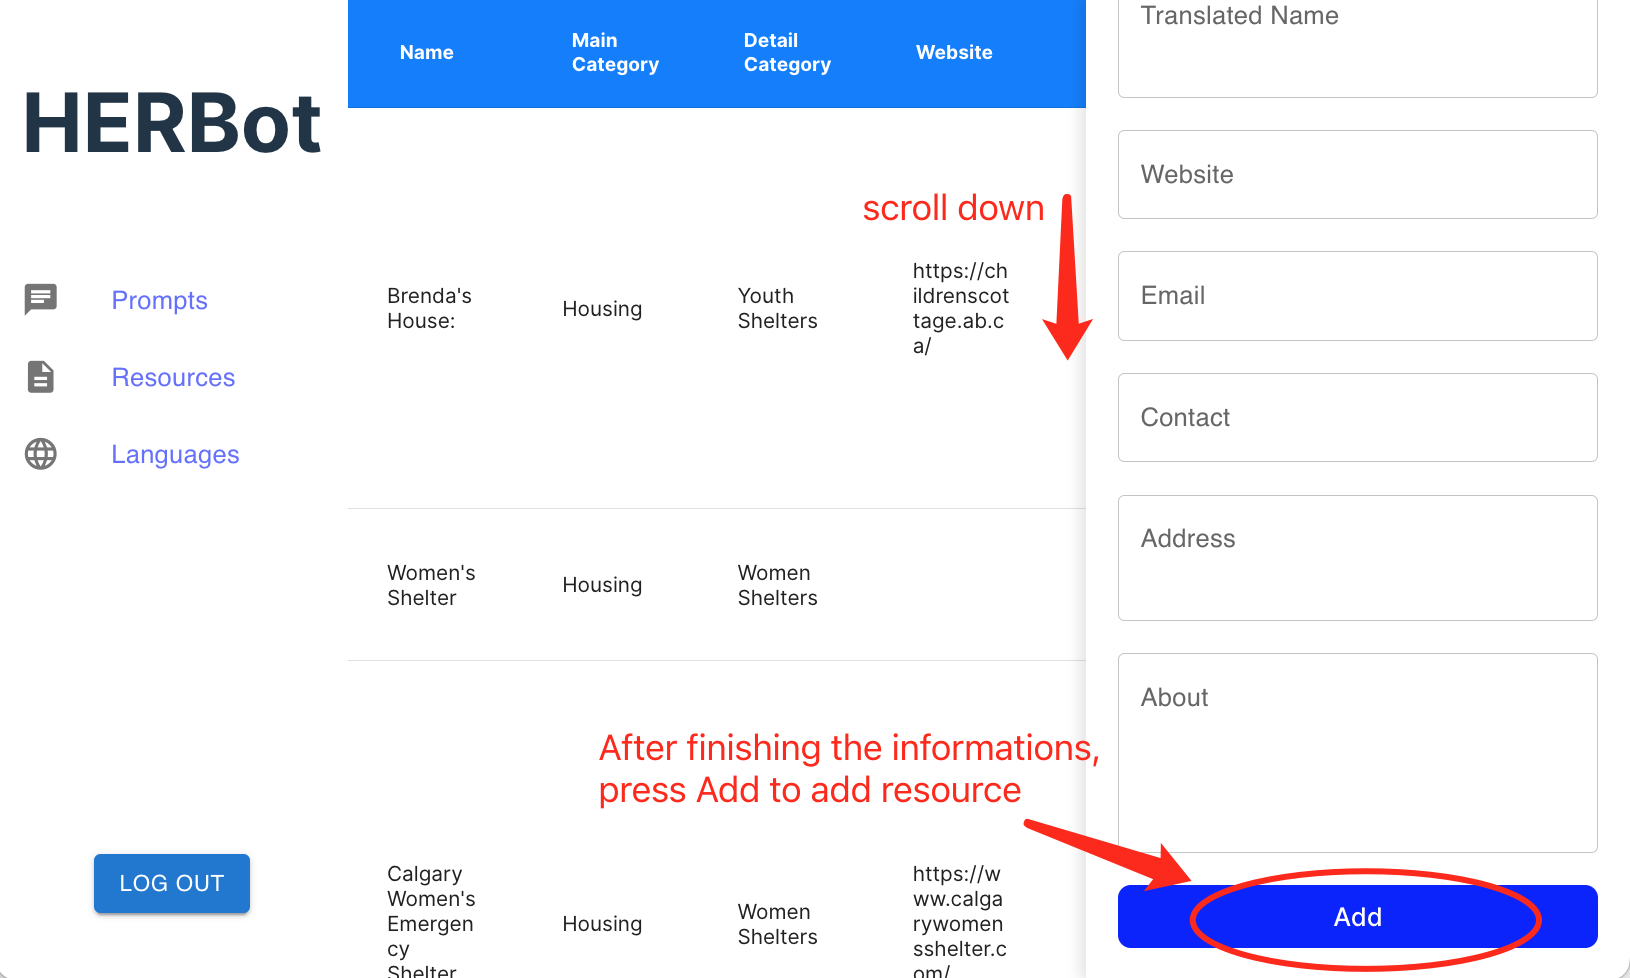
To add a resource, start by clicking on the button located at the bottom right corner. Then, enter the required information and click "Add" to add the resource.
-
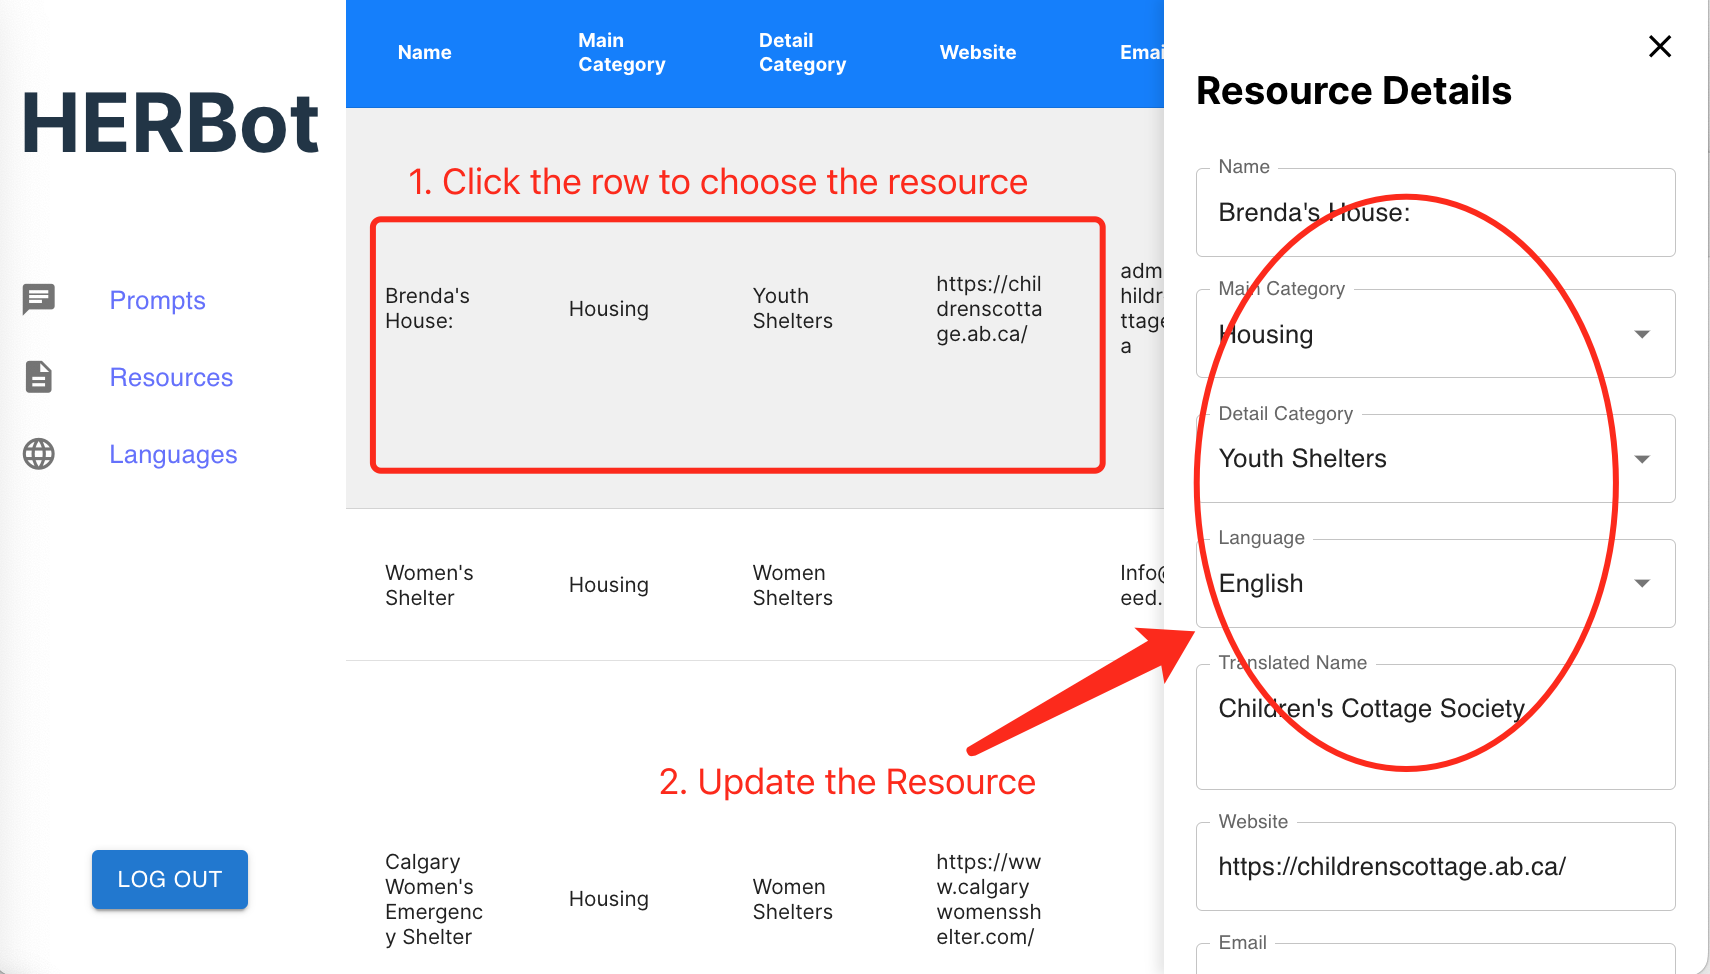
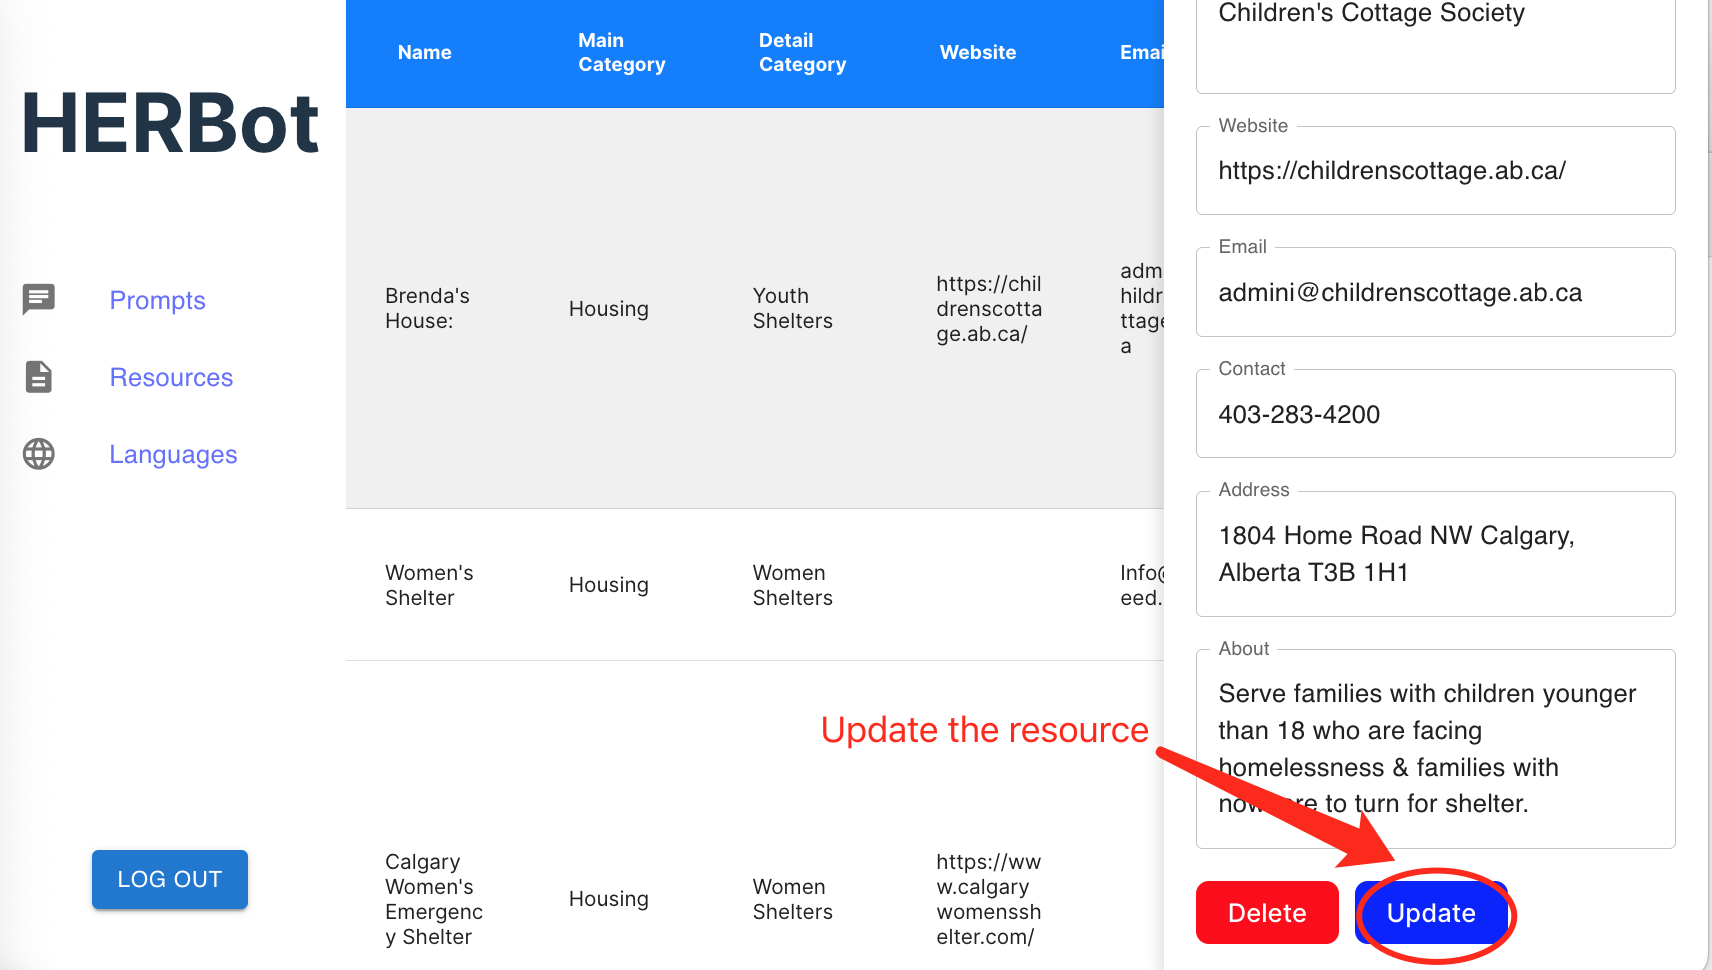
For updating a resource, click to select the corresponding row of the resource. Next, modify the information in the right drawer and click "Update" to save the changes.
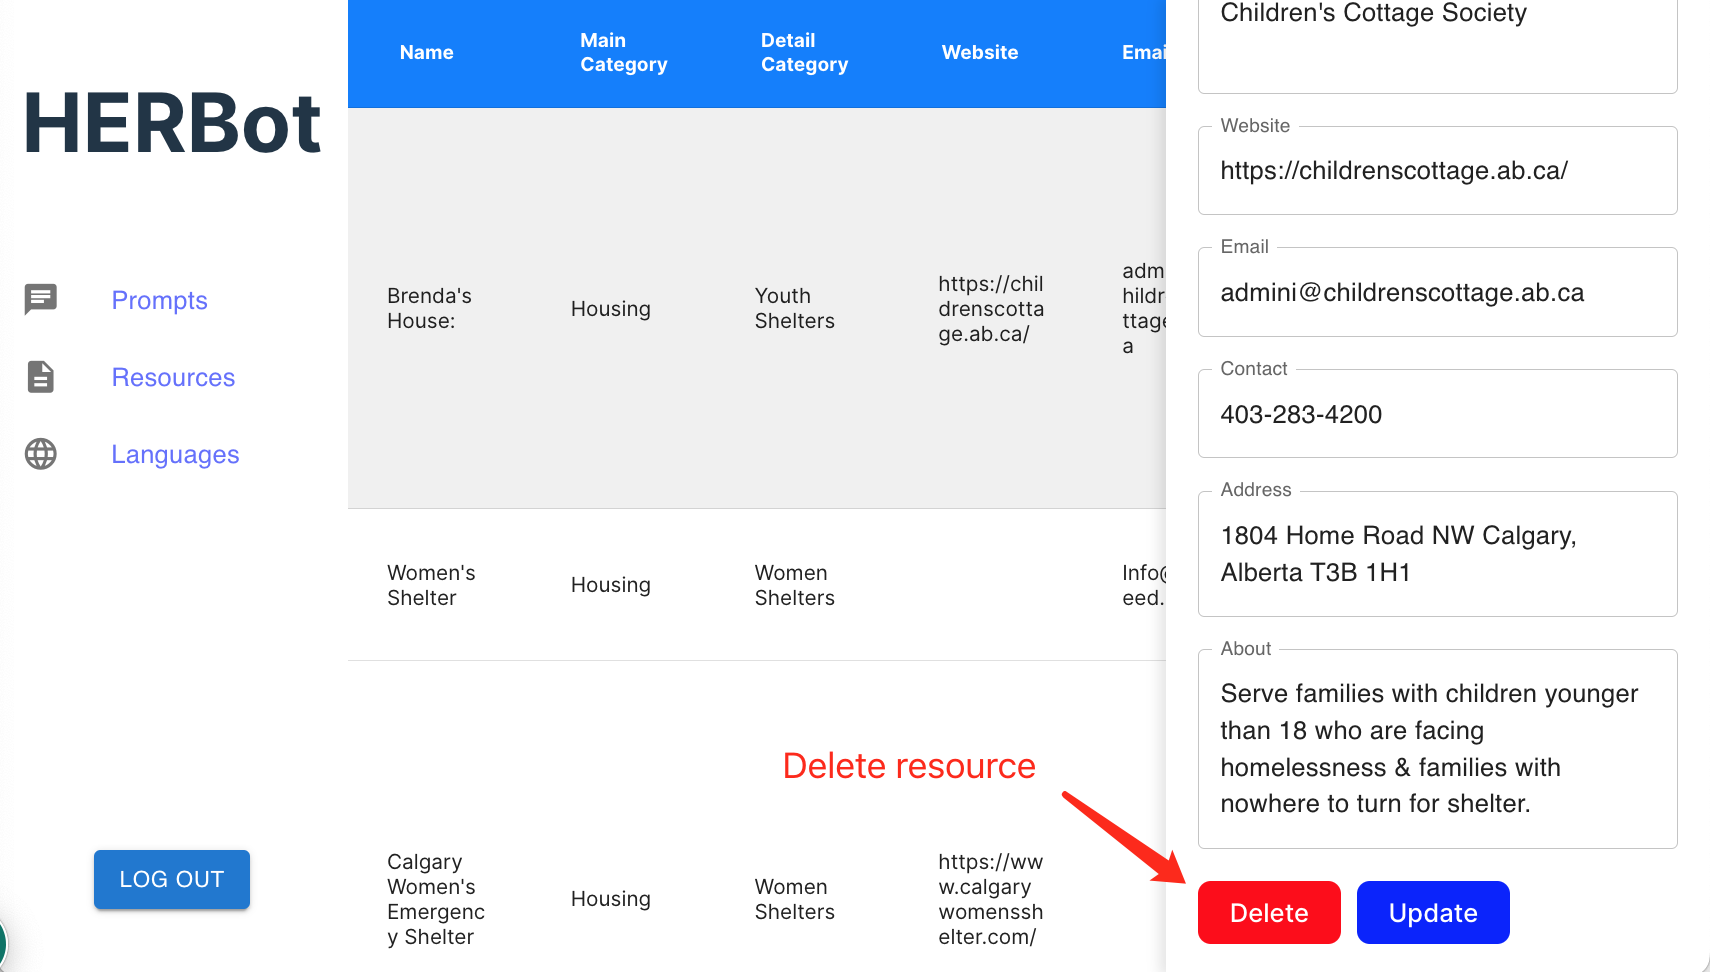
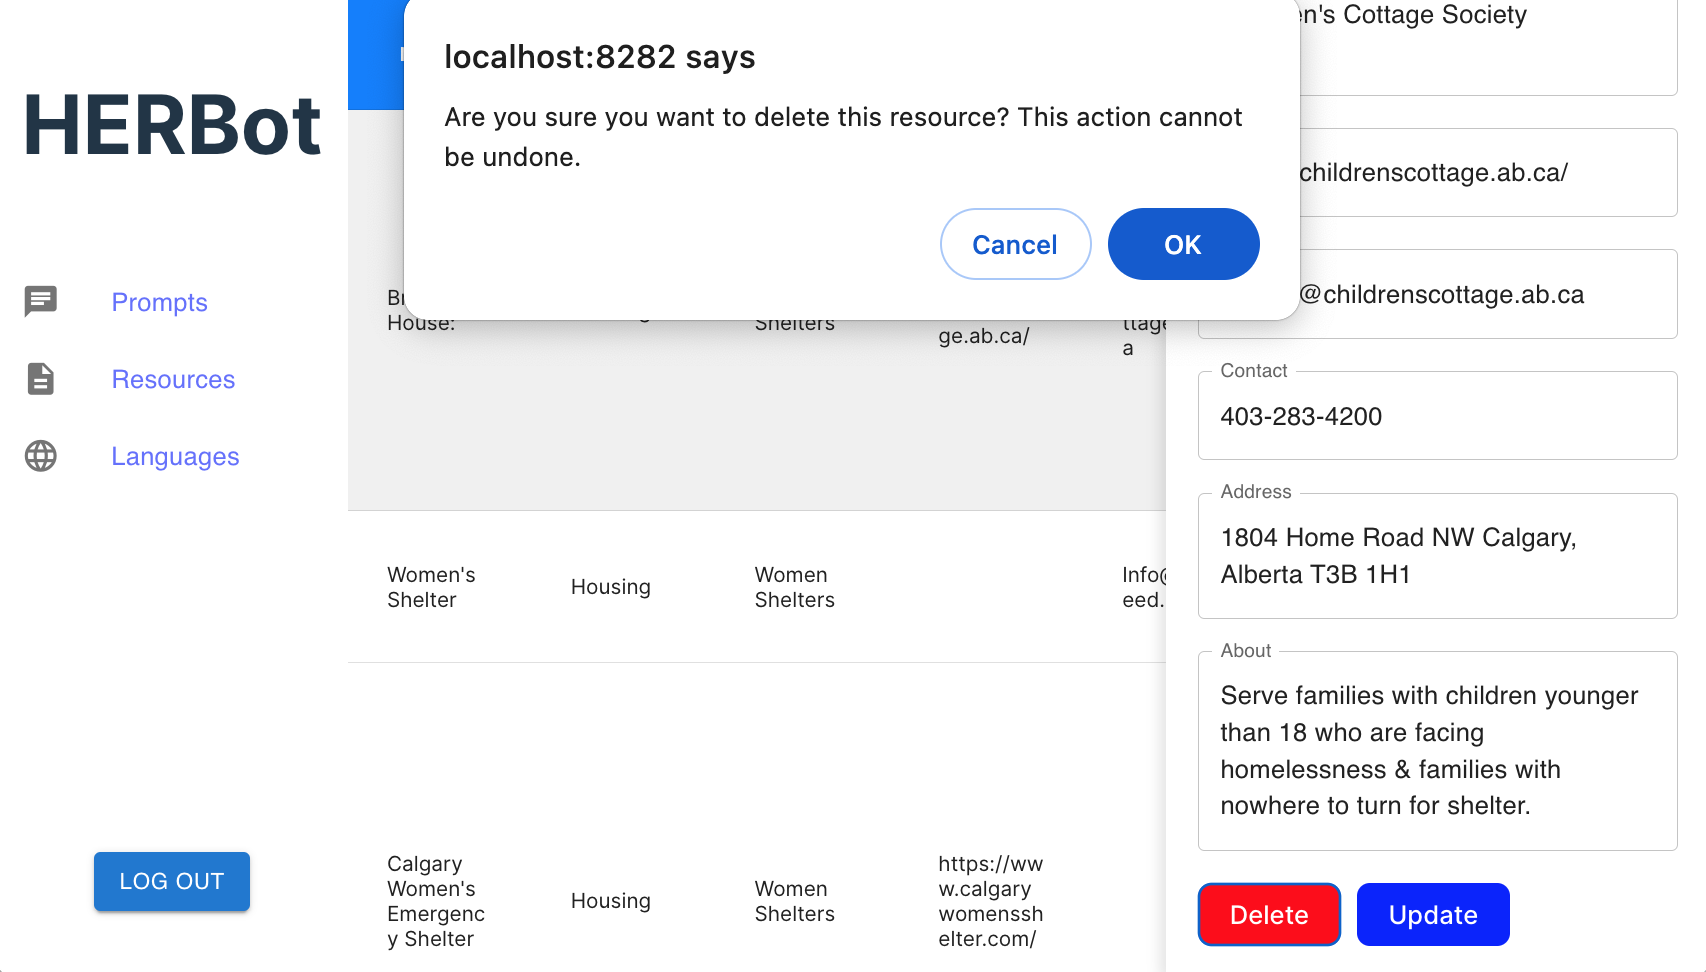
- To delete a resource, simply click to choose the row of the resource and then press "Delete". A confirmation notification will appear asking if you want to proceed with the deletion. Press "OK" to confirm.
How to Update/Delete/Add new Languages
You can also refer to this video tutorial for more detailed instructions:
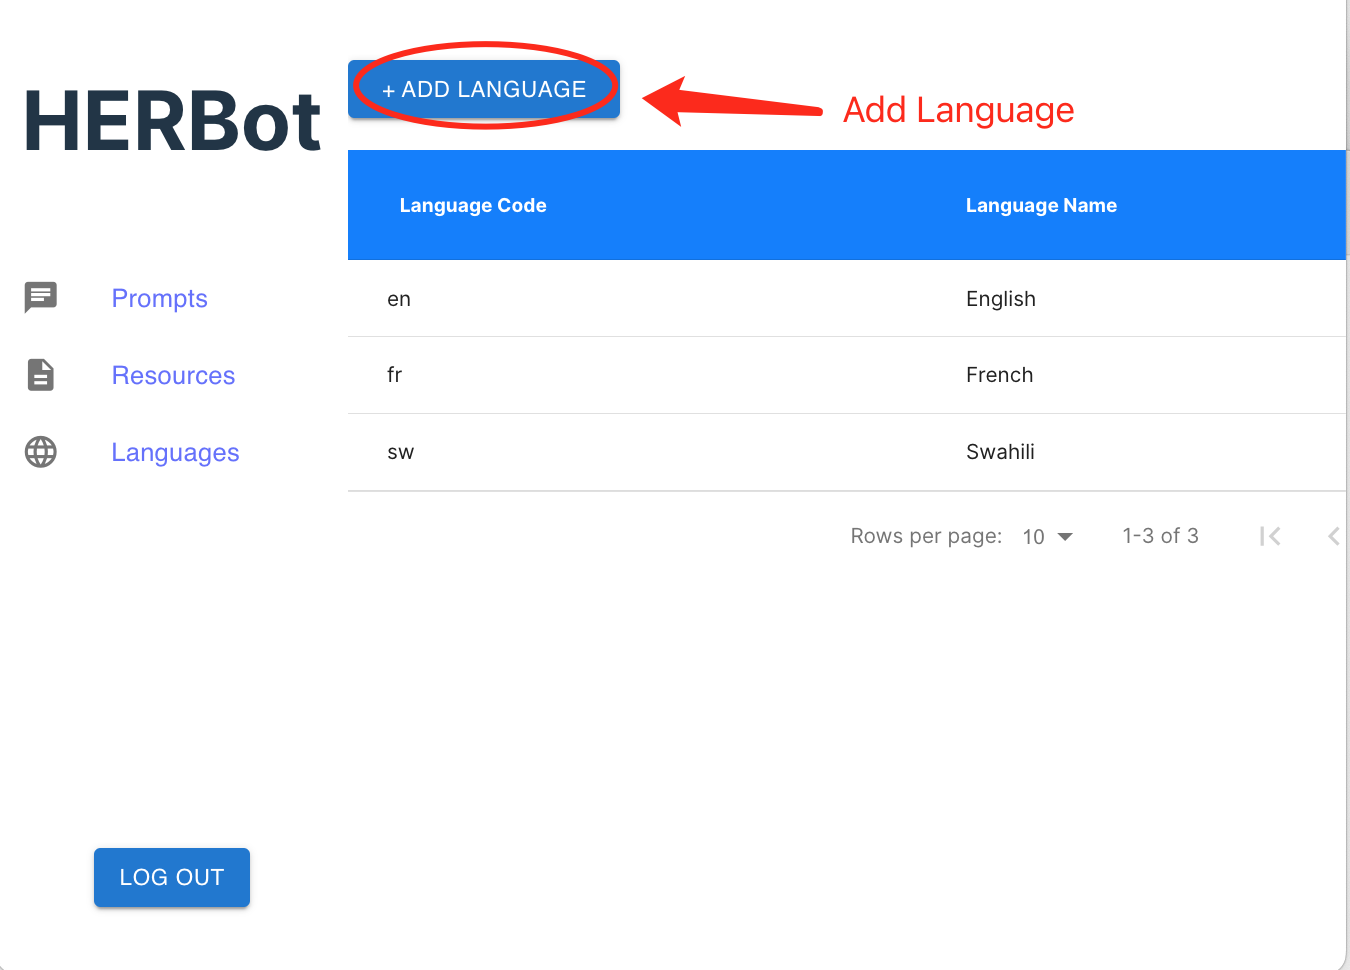
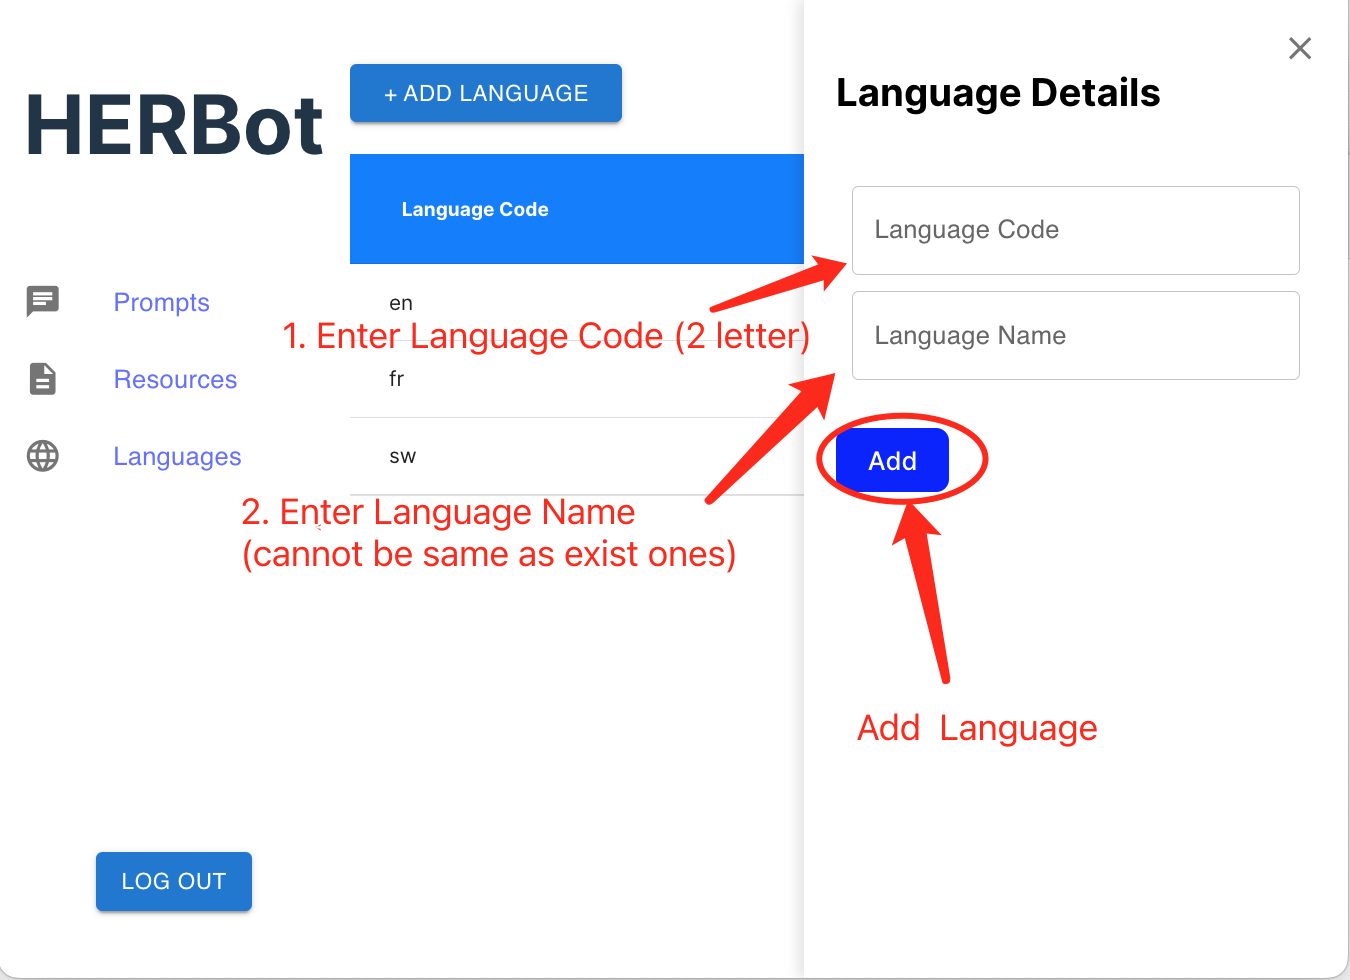
- To add a language, start by clicking on the button located at the top of the page. Then, enter the required information and click "Add" to add the language. The language code has to be 2 letters and no repetition in code or name are allowed to appear.
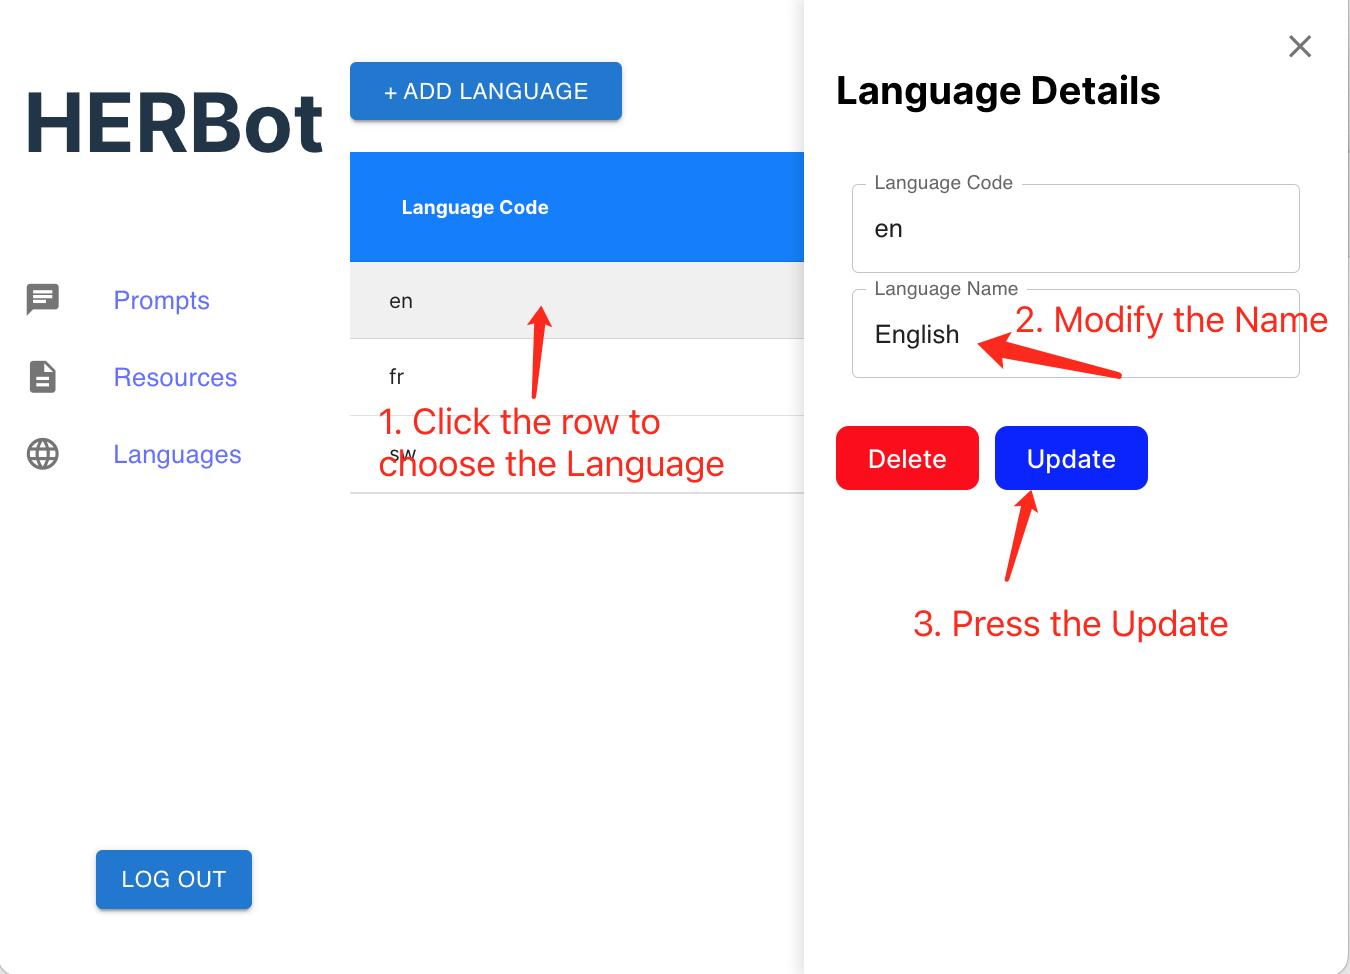
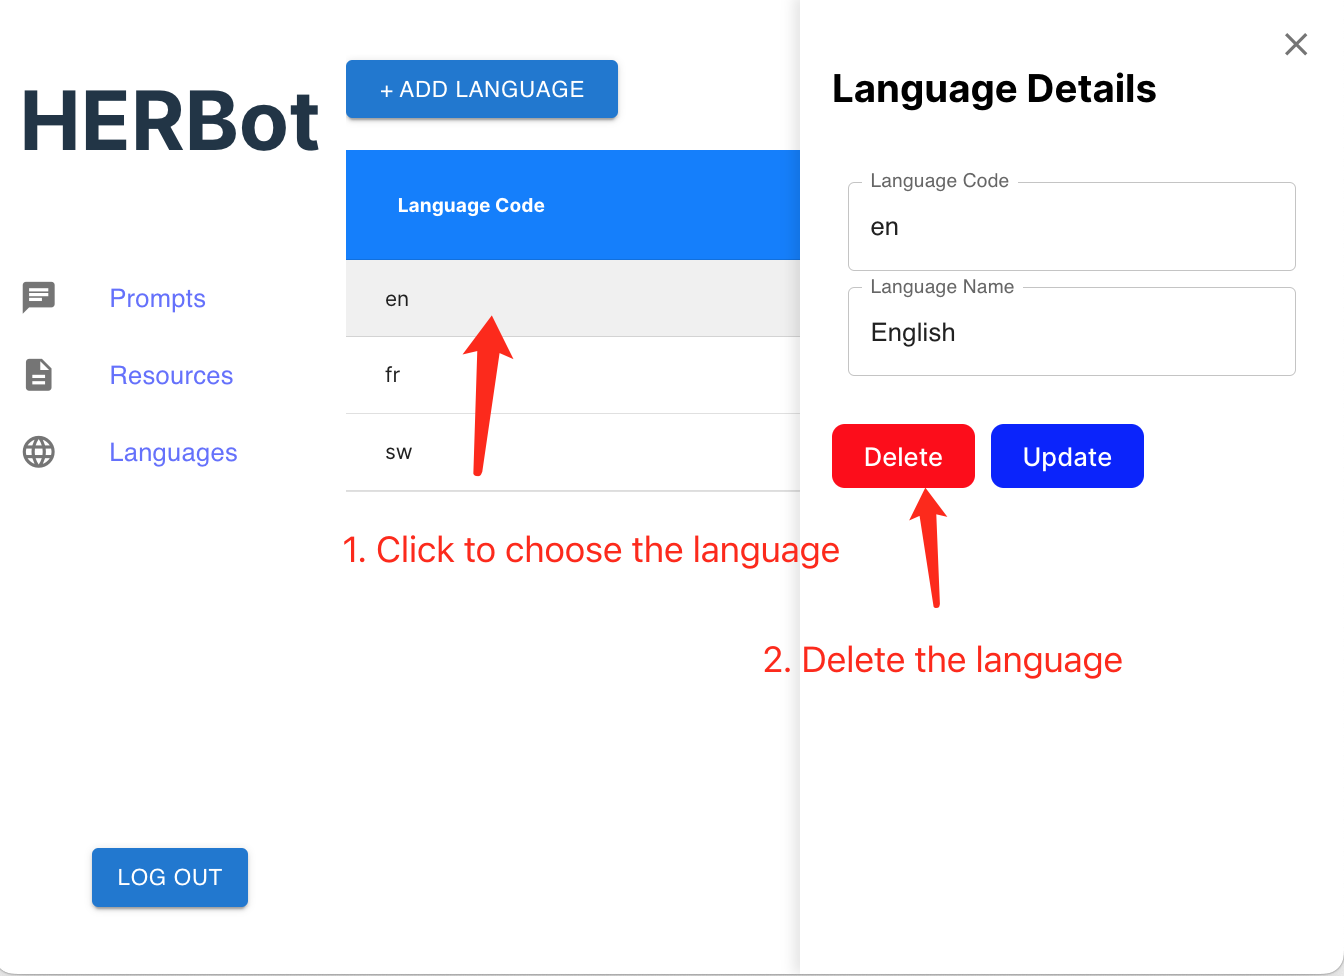
- For updating a language, click to select the corresponding row of the language. Next, modify the name in the right drawer (the code is not able to modify) and click "Update" to save the changes.
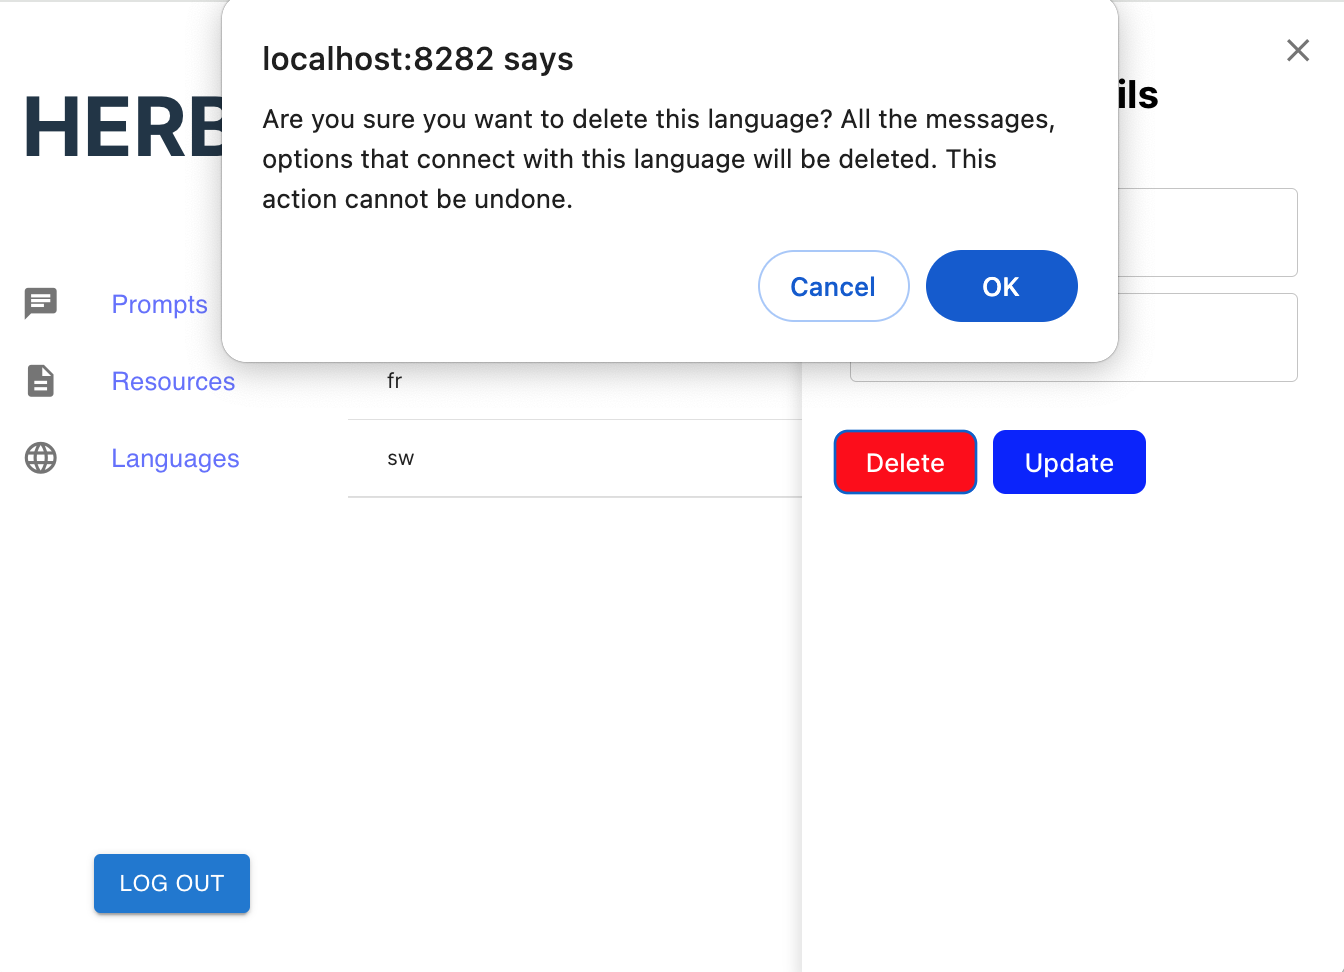
- To delete a language, simply click to choose the row of the language and then press "Delete". A confirmation notification will appear asking if you want to proceed with the deletion. Press "OK" to confirm.
Code Repository
Please refer to this video tutorial for detailed instructions: